
Taking Laundry into the Future: My Adventure with Modified Machines and 3D Printing
I outline automating my washing machine using 3D-printed parts and servo motors, cleverly avoiding any tweaks to the original system. It’s a tech-savvy, non-invasive upgrade for hassle-free laundry days.
So, out of the blue, a buddy of mine approached me with a cool project. The mission? Retrofit an everyday washing machine to be automated but, get this, without hacking into its original system or using another MCU in place of the original control panel. Sounds challenging, right? Instead, we had to get crafty and simulate human operation using servo motors.
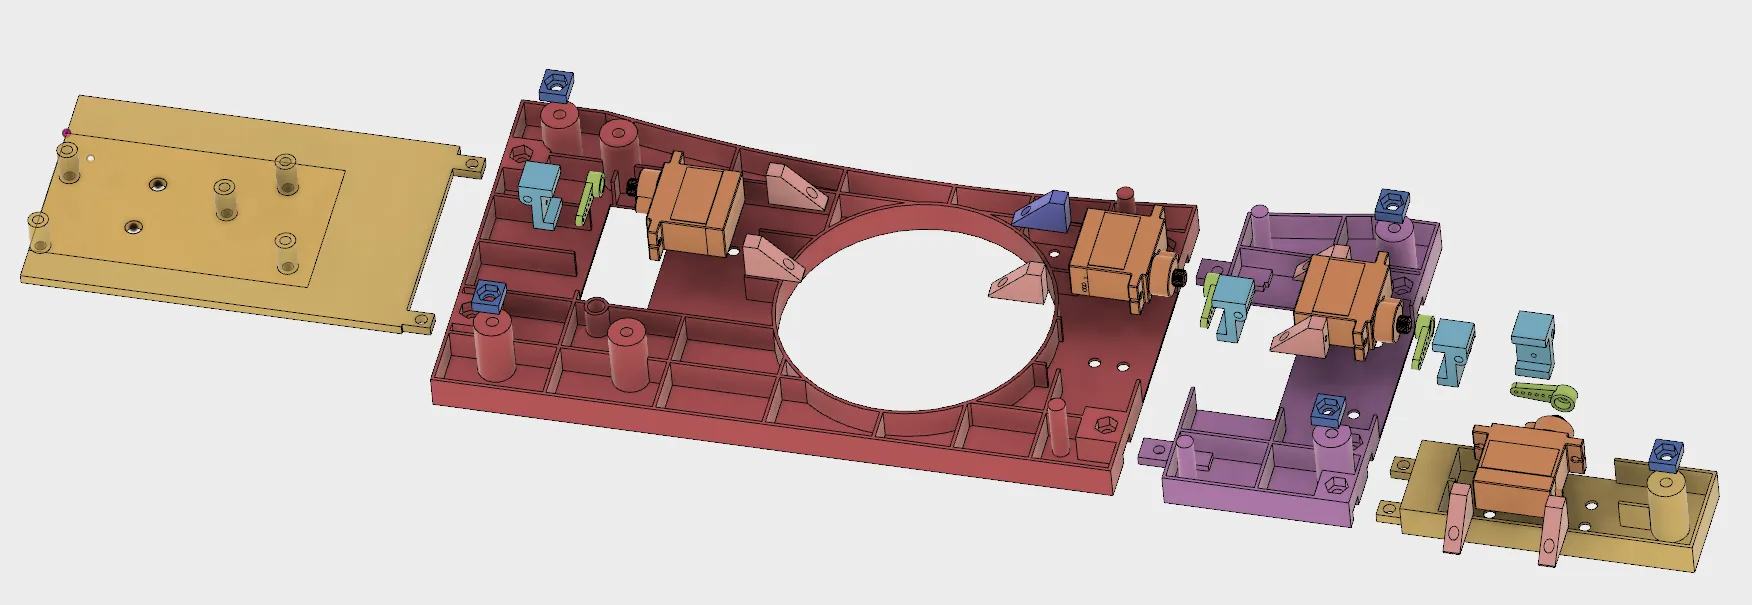 Model Explosion via Fusion 360
The idea was to attach a 3D-printed framework right onto the washer’s control panel. The challenge? The panel wasn’t flat but curved, making aligning the screws super tricky. But hey, no pain, no gain. We drilled holes in the original screw points and locked our frame in place. This setup was the base for our servo motors and electrodes to work their magic, pushing the washer’s buttons and integrating with the control circuit board.
A couple of hiccups along the way:
Getting the Measurements Right: The curve of the washing machine’s control panel meant we had to up our game in reverse engineering its dimensions.
Keeping It Light: Our design needed to be light to keep 3D printing costs down. There was a sizable knob on the control panel that interfered with our frame, so we had to create a cutout to avoid it. At the same time, we ensured that the framework remained durable for long-term and repeated use.
Size Matters: The washing machine’s panel size was bigger than typical 3D printers could handle, which meant splitting the framework into several pieces that had to be assembled later.
Dealing with Material Differences: 3D printing materials aren’t always consistent. We had to factor in tolerances for different materials we might use in the future.
On a side note, I recently stumbled upon Autodesk’s Fusion 360 3D design software. I’ve been on SolidWorks for over a decade, but this looks even better! Thought I’d give it a spin and see if the hype’s real.
Measuring Up the Control Panel
Slapping those control panel images, front and back, onto my worktable was just the start. Now, reverse-engineering its dimensions? Man, that’s like trying to guess the secret ingredients in grandma’s special sauce – super elusive and a total brain teaser. But hey, who doesn’t love a good challenge?
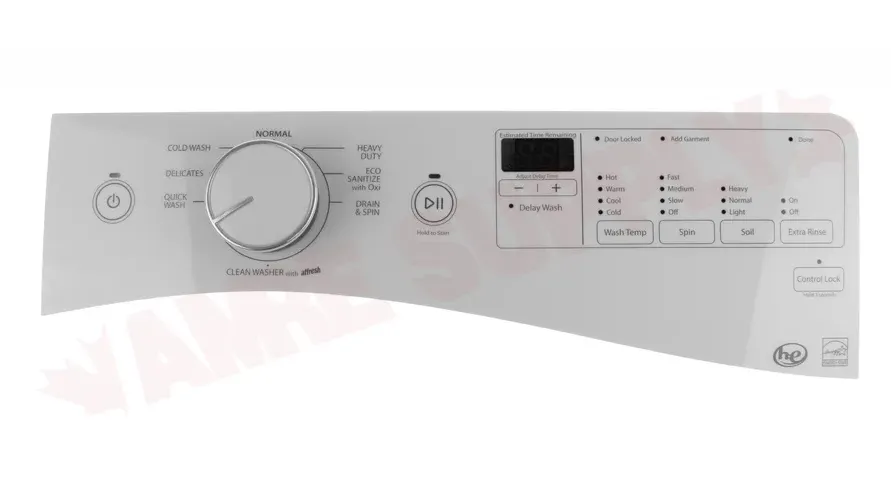 Front View
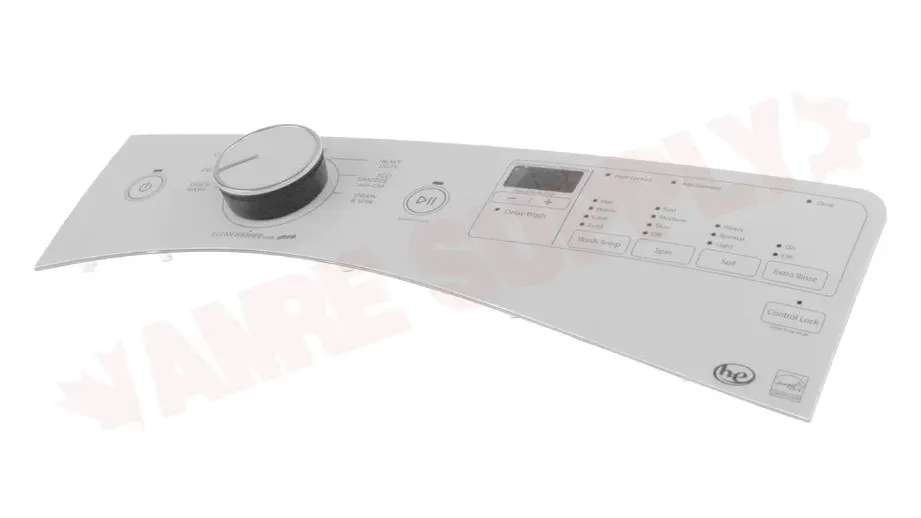 Front Isometric View
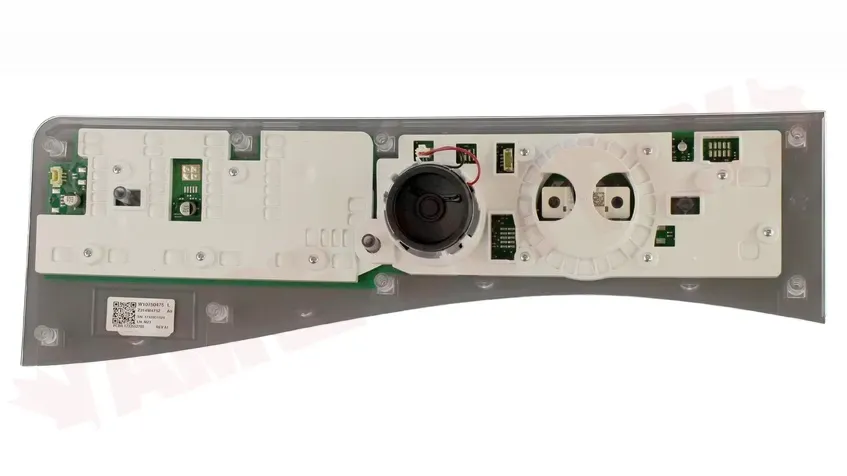 Back View
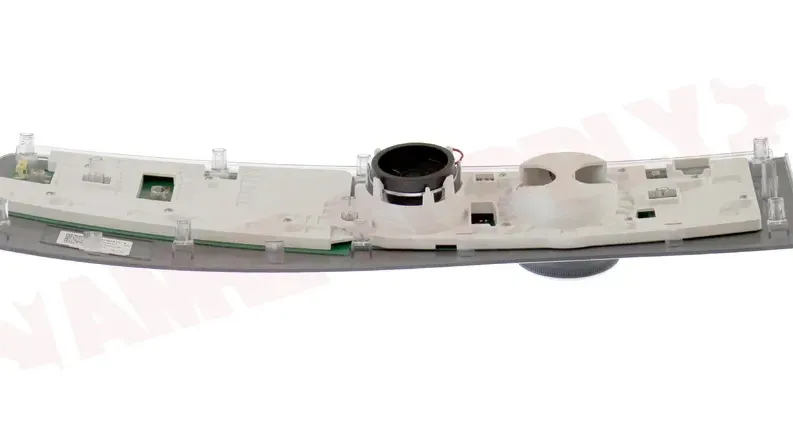 Back Isometric View
Sketching it Out with Fusion 360
Alright, peep this - I’ve laid out a neat draft of the control panel’s mechanism using Fusion 360. And if you zoom in on those ribs I’ve incorporated into the design? Not just a style choice. Those bad boys are intentionally there to cut down on the 3D printing material while keeping things solid and sturdy. Every bit of detail is a calculated move. Here’s a little demo of some components to give you a taste of this design journey. Honestly? Fusion 360’s got game, and it’s making this project look slicker than I ever imagined
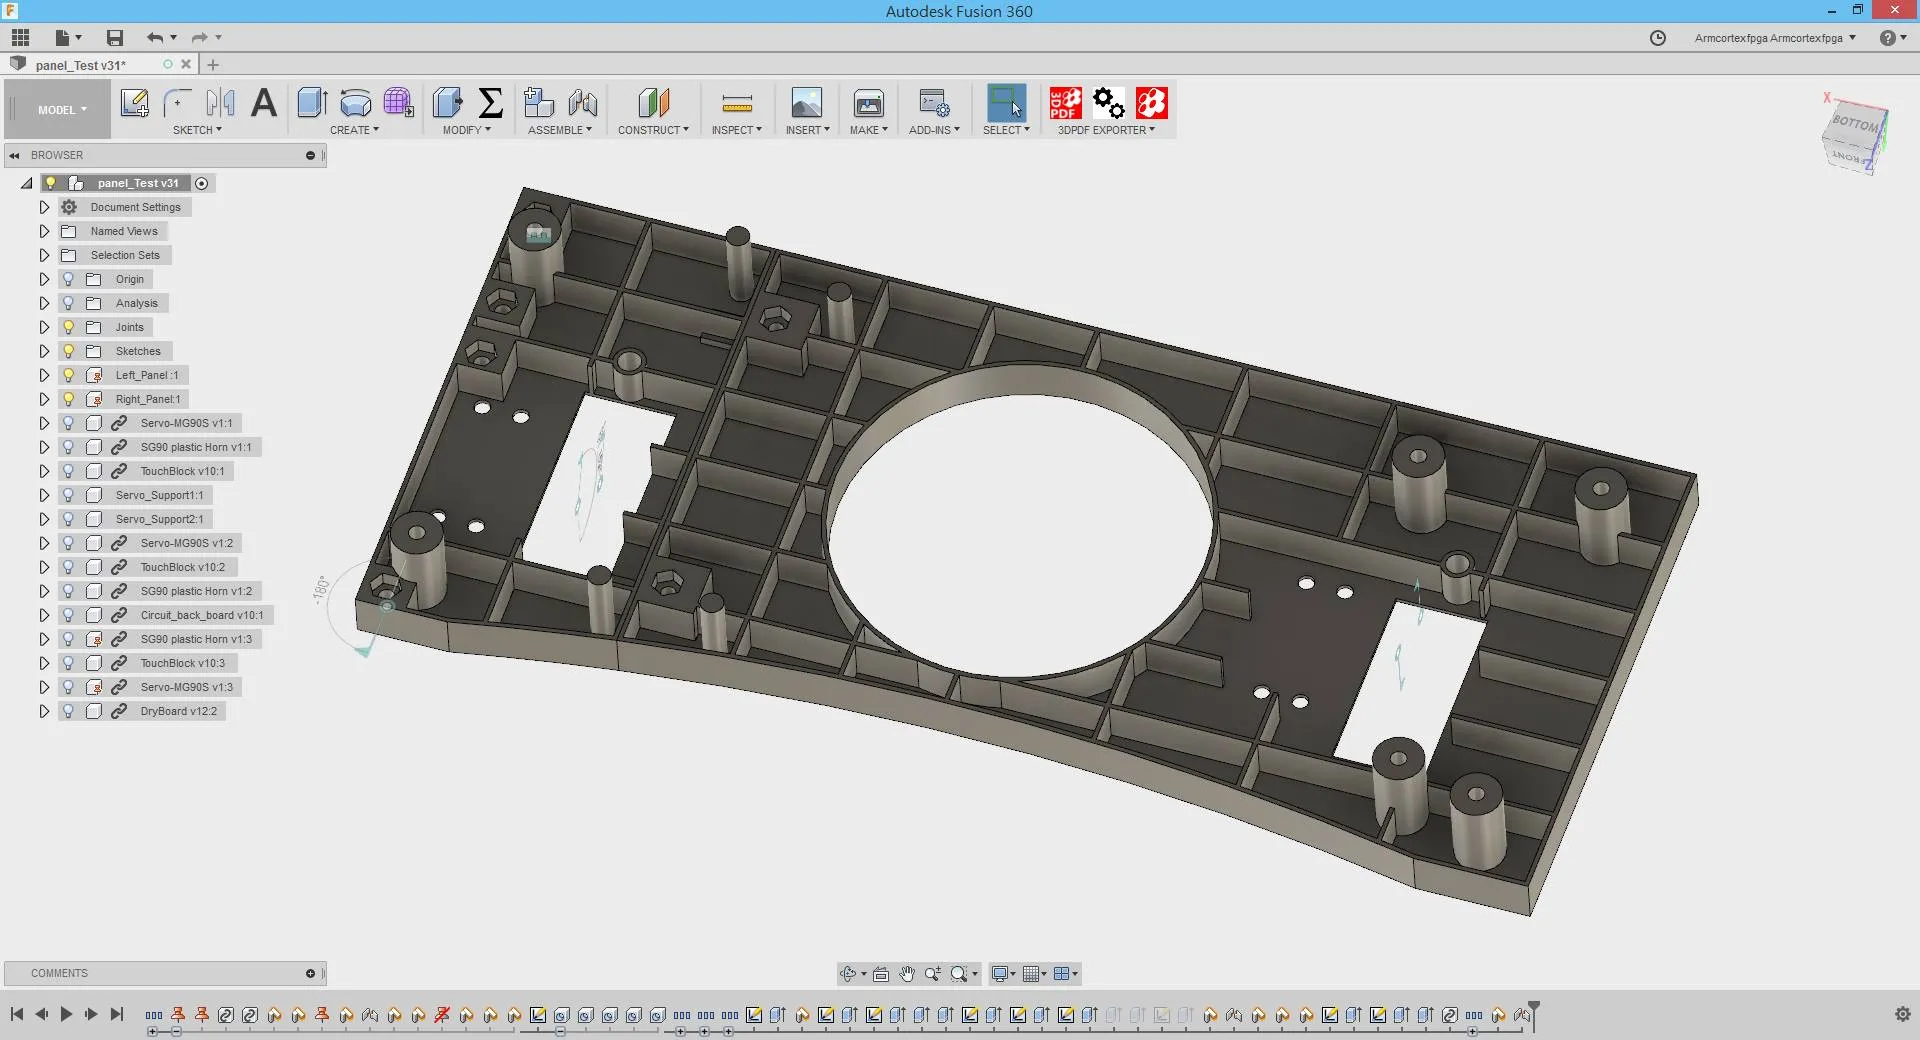 Model Sketching
Assembling the Dream Setup
Ready for the magic reveal? Up next, I’ve got a visual treat for you: a full-blown image featuring the meticulously designed panel frame module, the trusty PCB bracket, our servo motor in all its glory, and the mount that’s going to hold that little powerhouse in place. Every single essential piece for our control panel? Right there in one epic ensemble.
But here’s the real kicker: post-assembly, I gave it a whirl in Fusion 360, moving and simulating to ensure these components played nice. Had to make sure there were no unexpected collisions or surprise interference that might throw a wrench in our final assembly. Every module, every screw, every wire - it’s all been tested to work harmoniously. It’s kind of like ensuring all the instruments in an orchestra are in tune before the big concert.
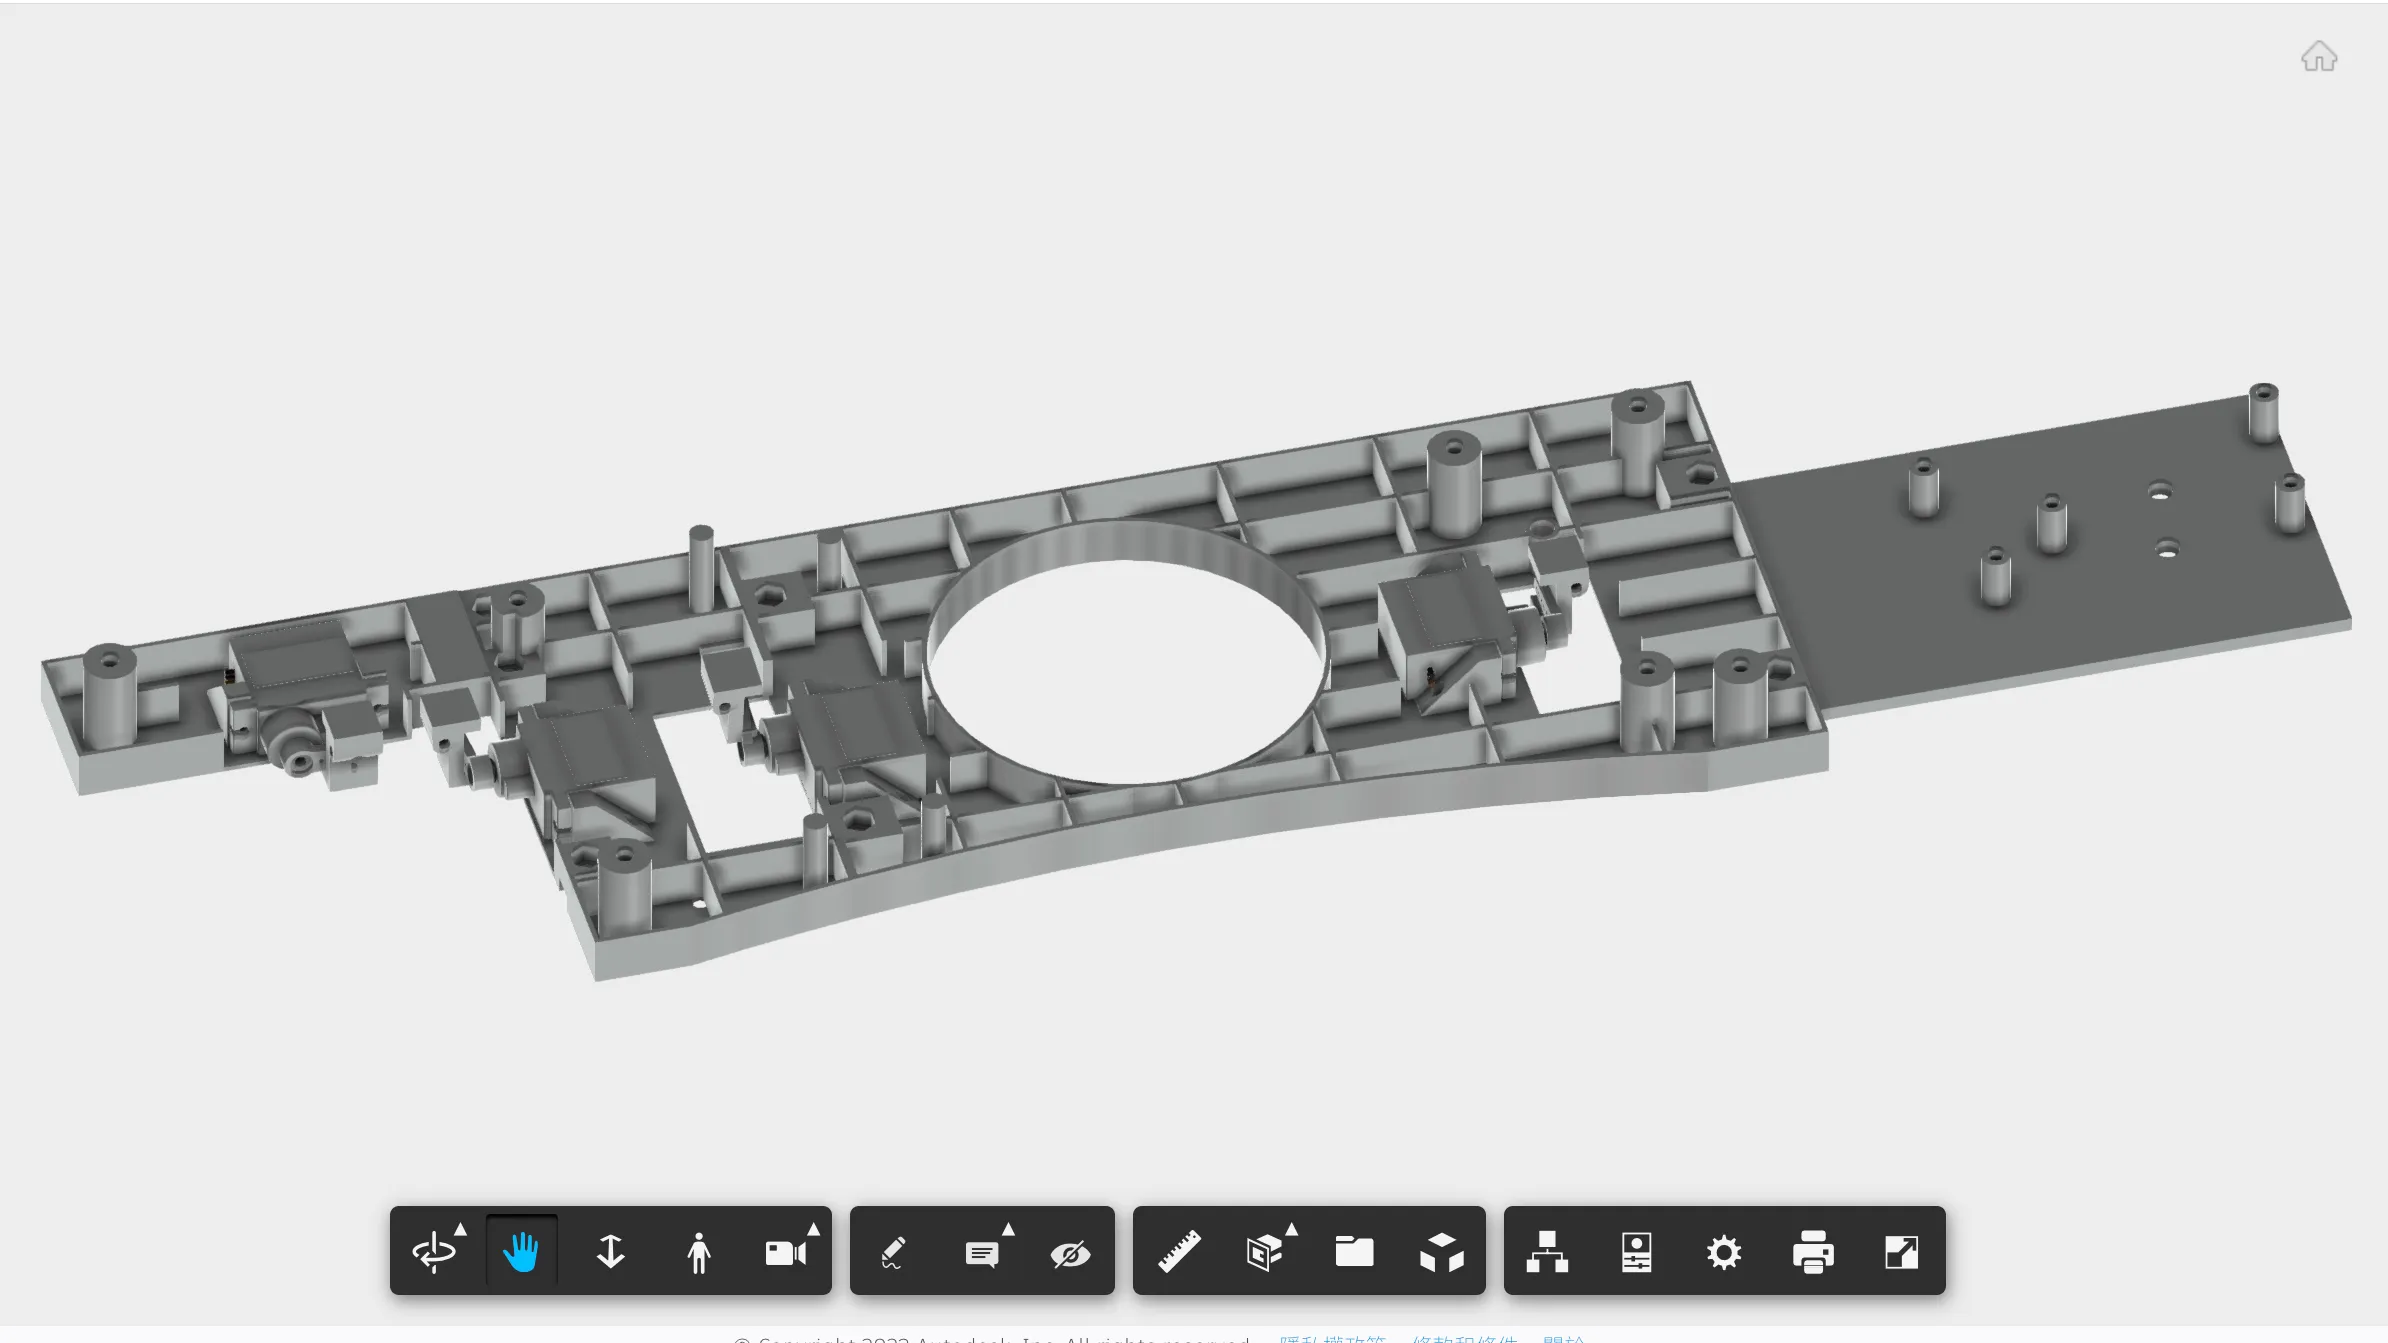 Model Component Assembling
Unveiling the Masterpieces
And now, the moment we’ve all been waiting for. Feast your eyes on the next two visuals – pristine 2D schematics of our tailored mechanical frame designs for two distinct washing machine panels.
But wait, there’s more. Not only have we captured the essence of each component in these drafts, but every piece is also labeled with precision, ensuring you’re never left scratching your head wondering, “What’s this doohickey called again?”
And for the cherry on top? An exploded view that lays bare the beauty of our design, pulling apart each piece and showing the meticulous planning and detailing that went into this work of art. Think of it as a symphony of parts, each playing their role in our grand mechanical ballet.
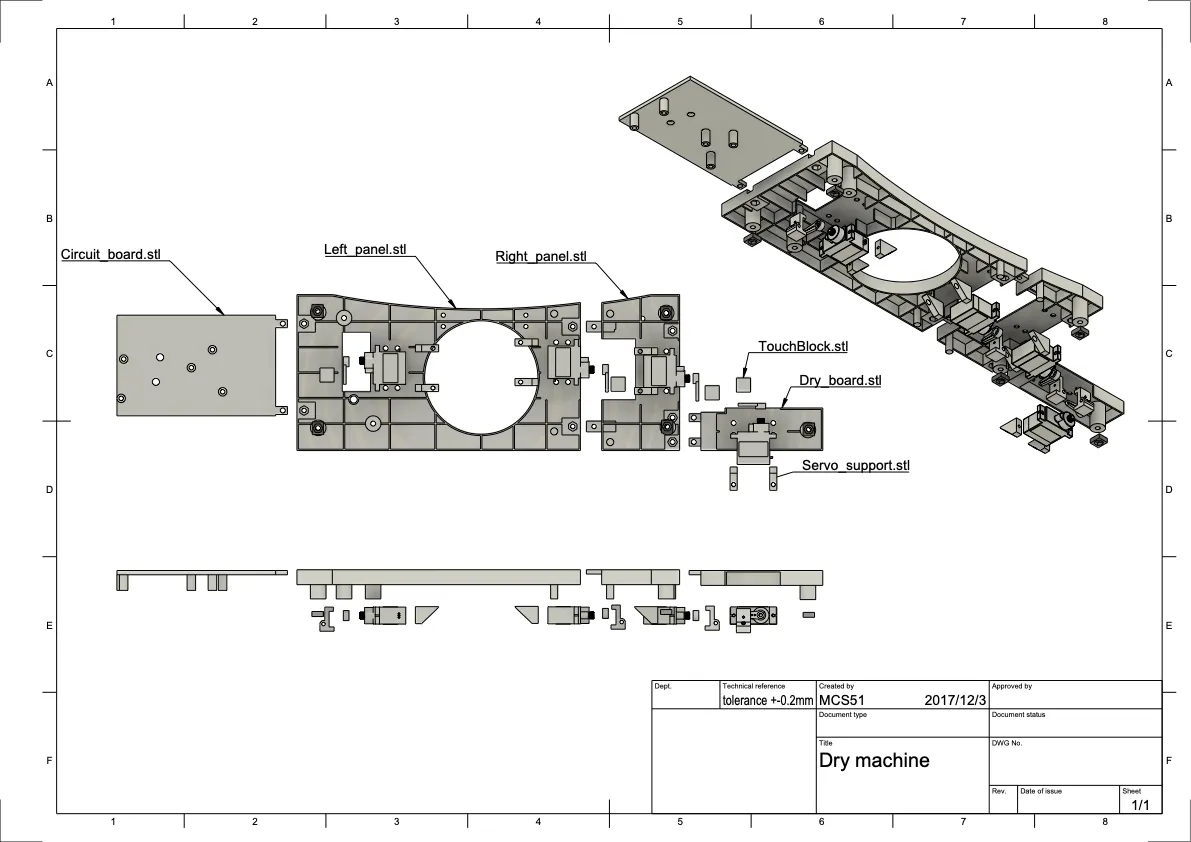 Drying Machine 2D Schematics
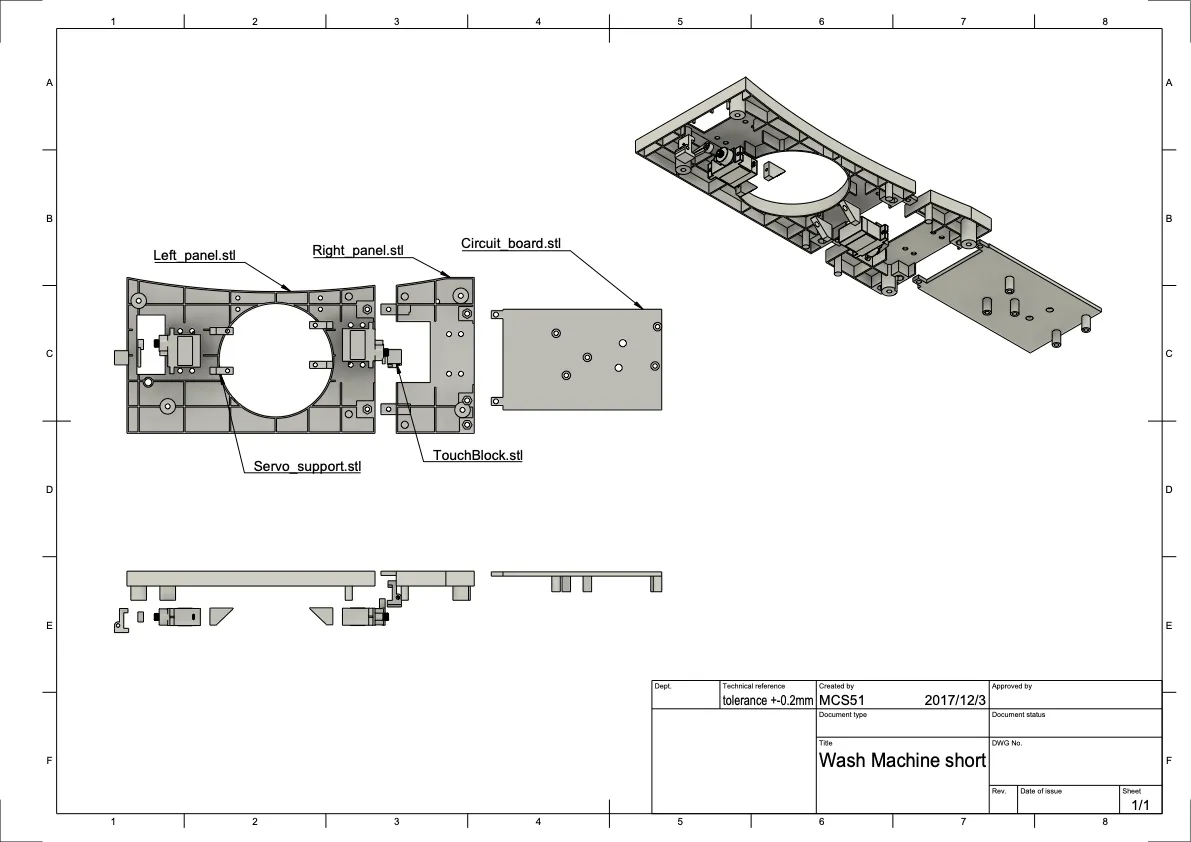 Washing Machine 2D Schematics
From Digital to Tangible – The Assembly Dance
Alright, folks, let’s transition from the virtual realm into the real world!
Following the 3D printing, it was time to piece our puzzle together. Each module, with screws in hand, waiting for their moment to shine. The goal? Seamless assembly. We needed to ensure that every piece fit together just as imagined, and the process was as smooth as a freshly ironed shirt.
The highlight reel? Slotting in the motors. It’s not just about making sure they move – it’s about perfect motion, no interference, and precise contact with the panel. After all, we don’t just want our mechanical marvel to look good; it’s gotta act the part too.
So, with every screw turn and motor test, we inch closer to a world where your washing machine isn’t just a household appliance; it’s a testament to human ingenuity and design prowess.
Washign Machine
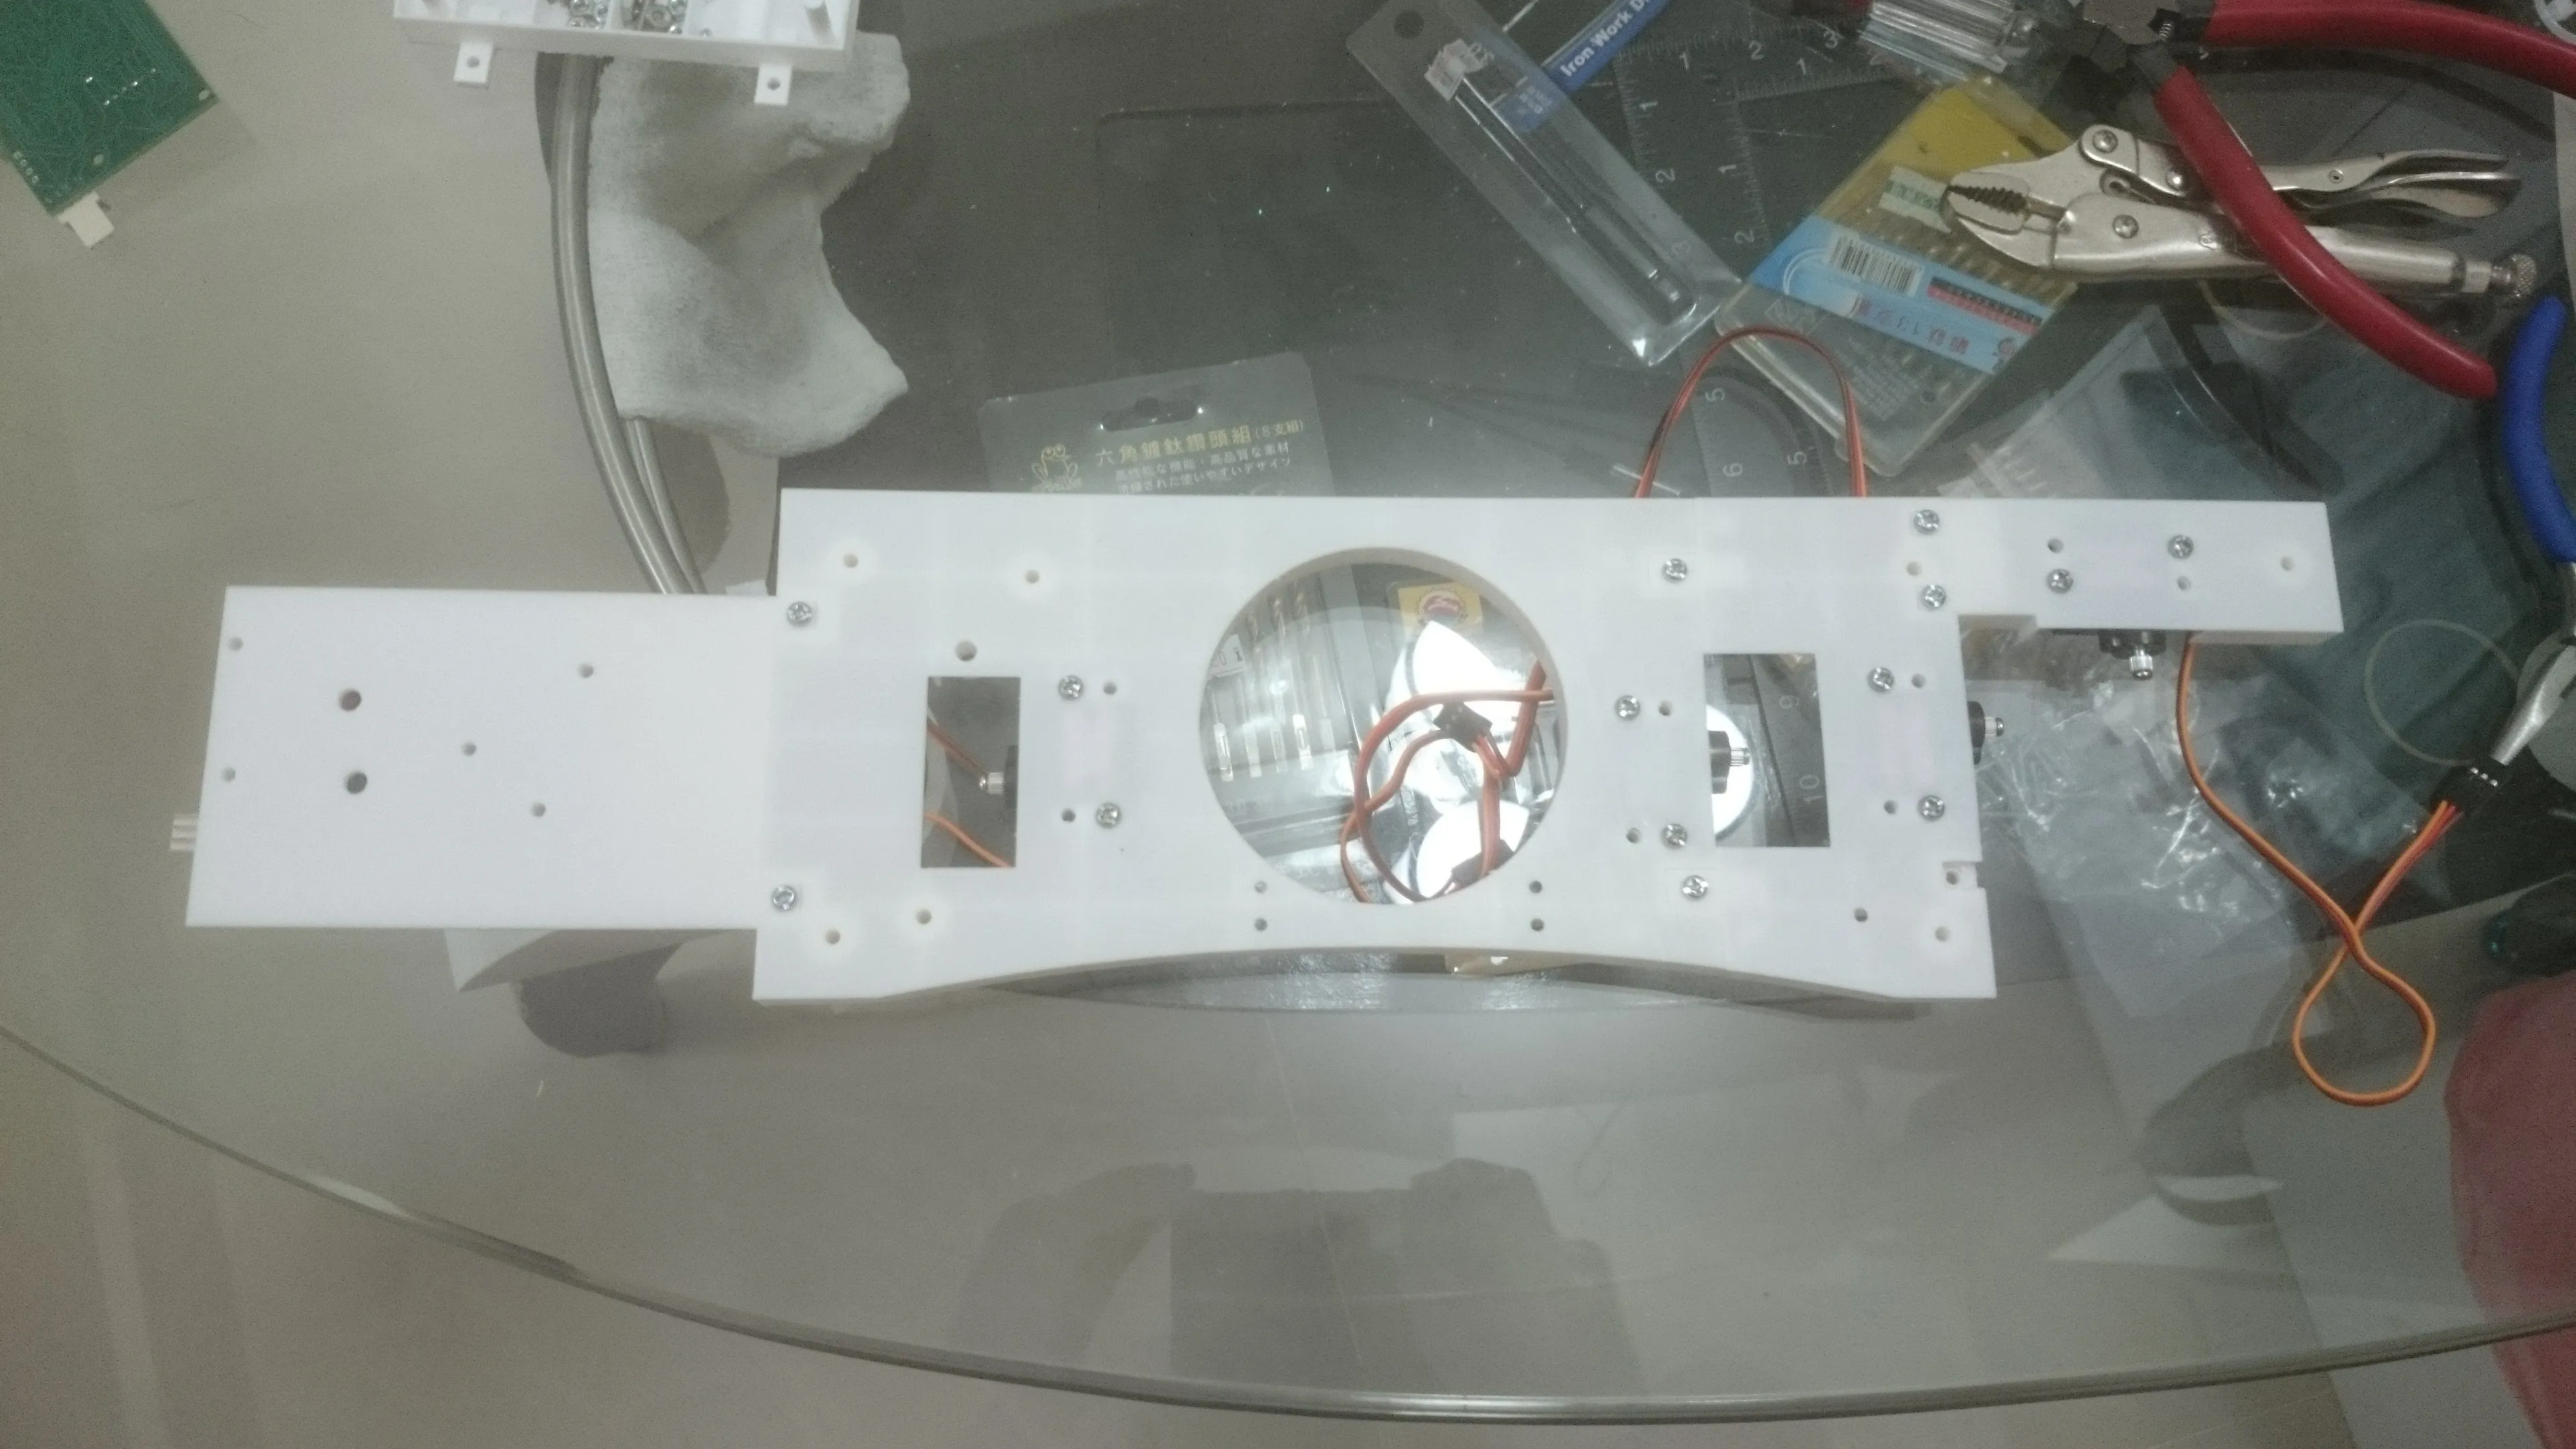
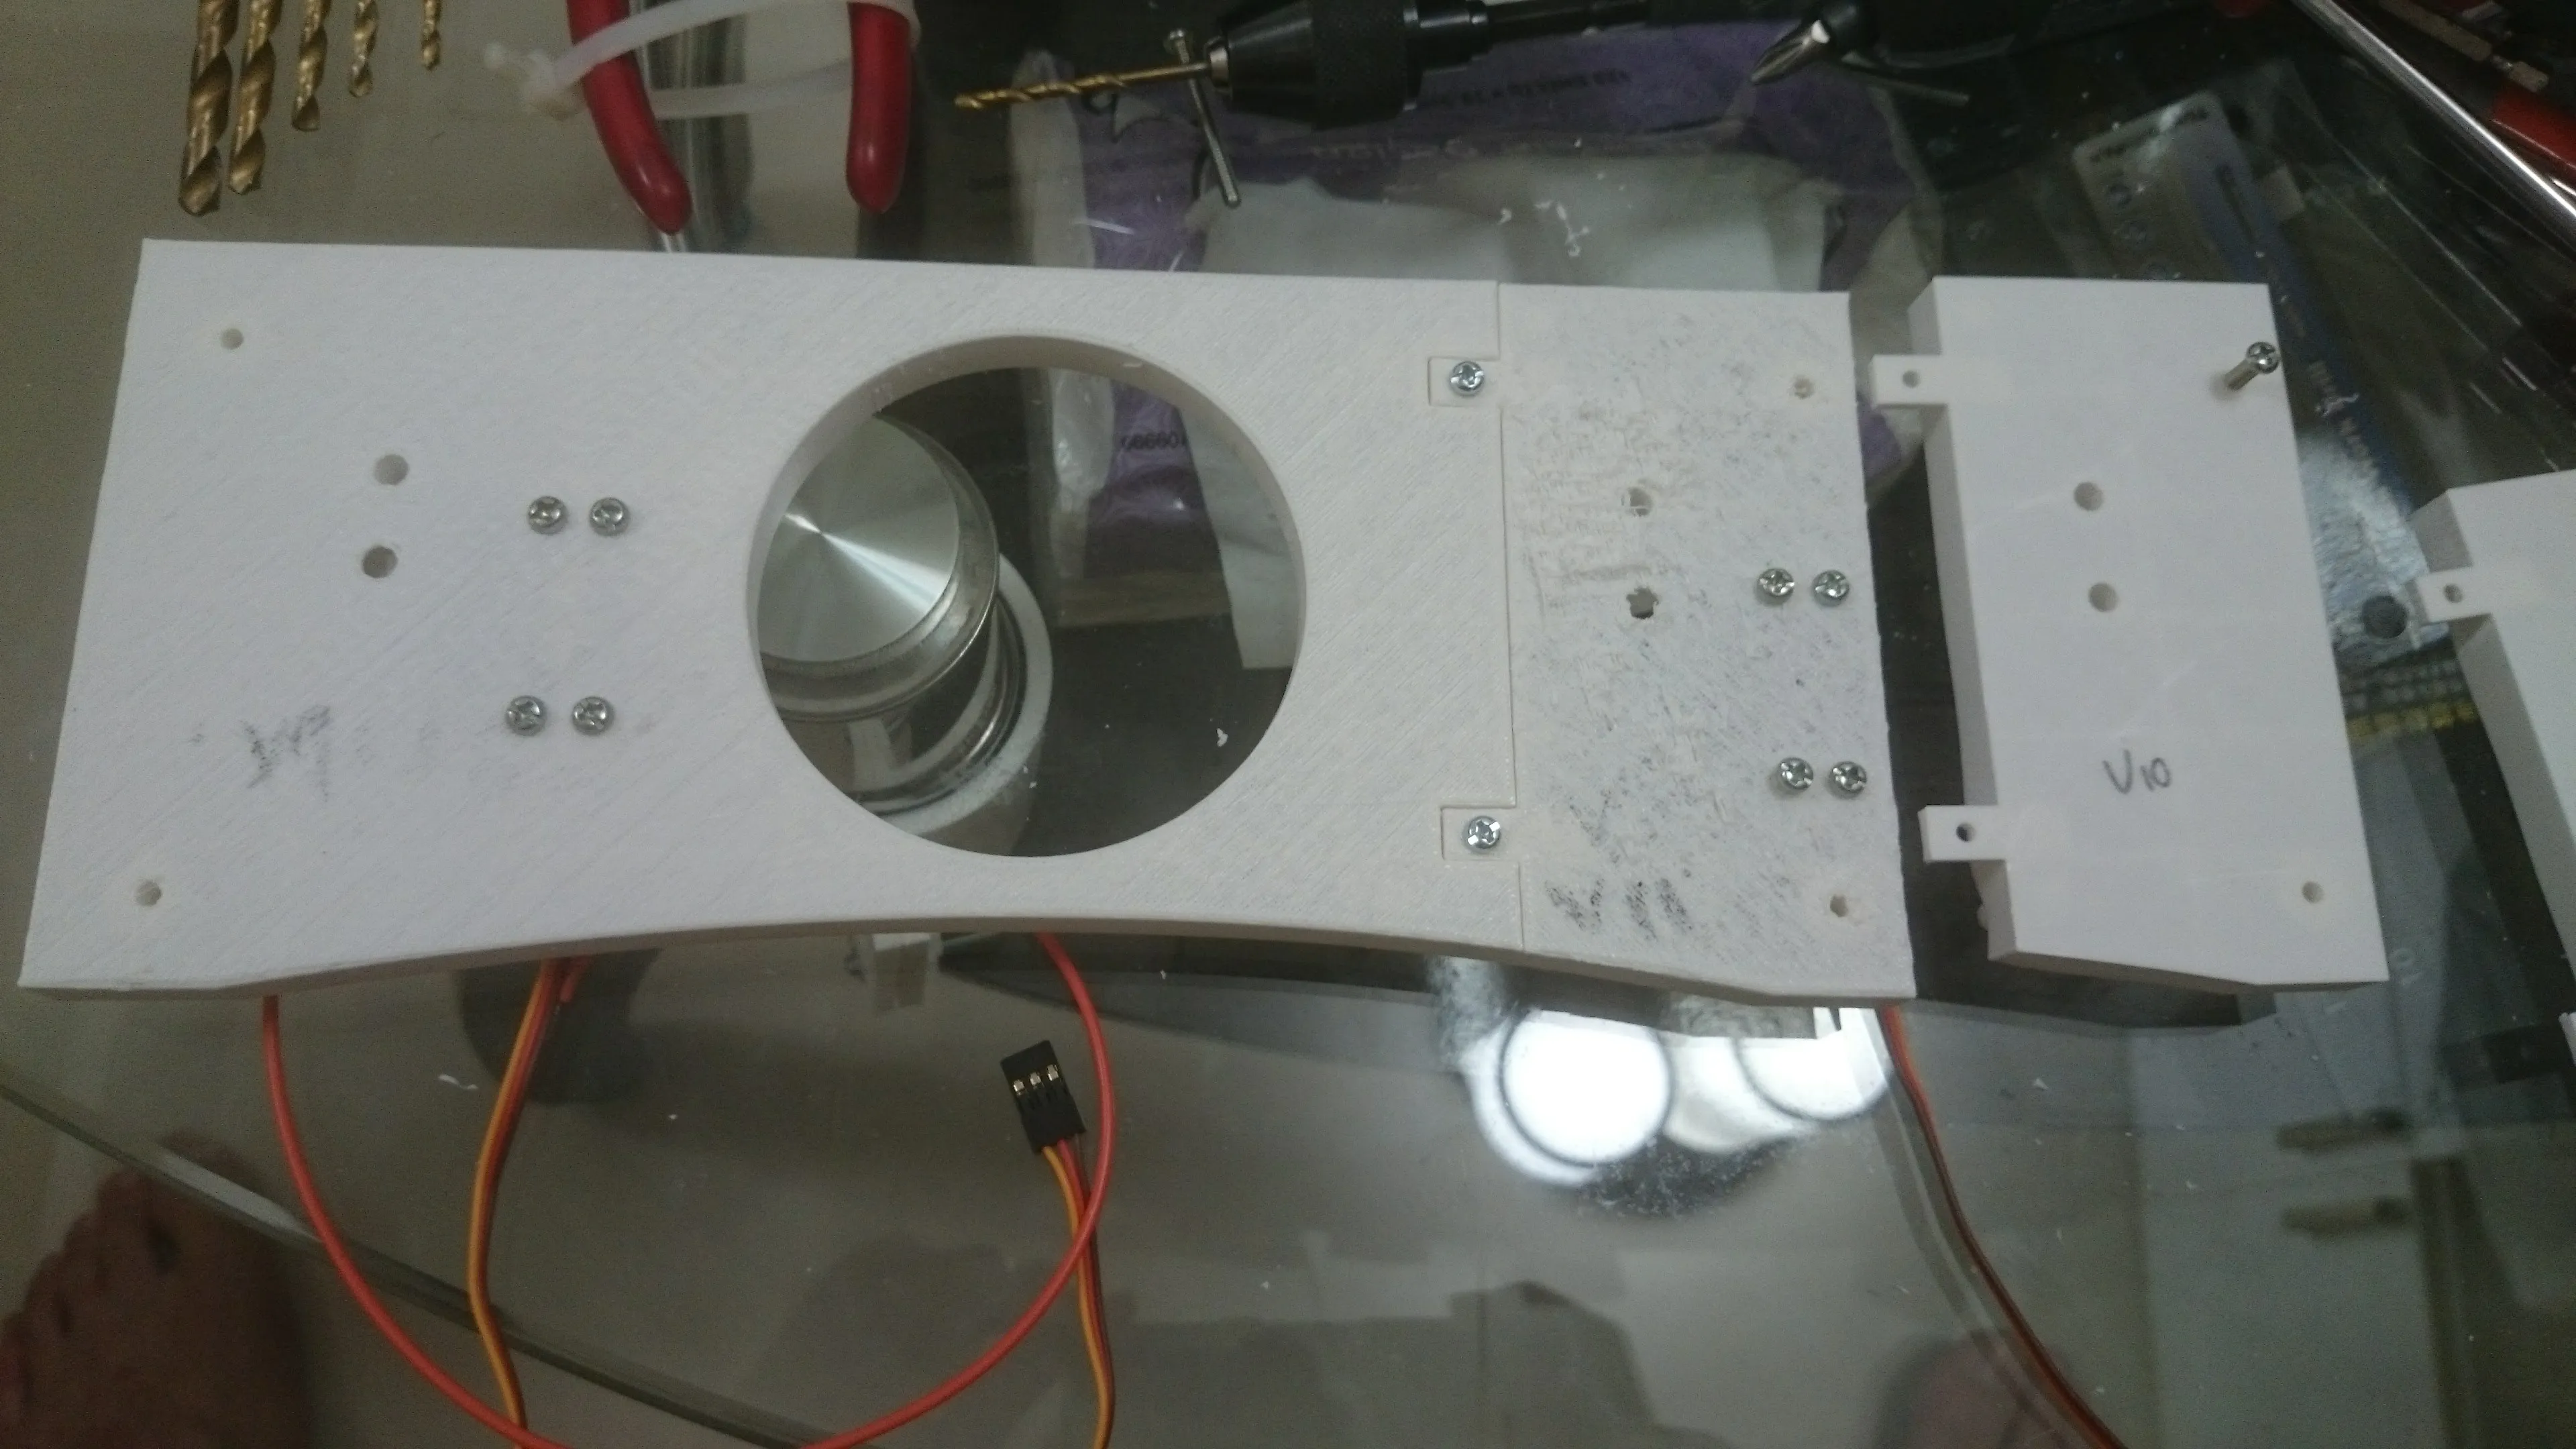 Frame Assembling
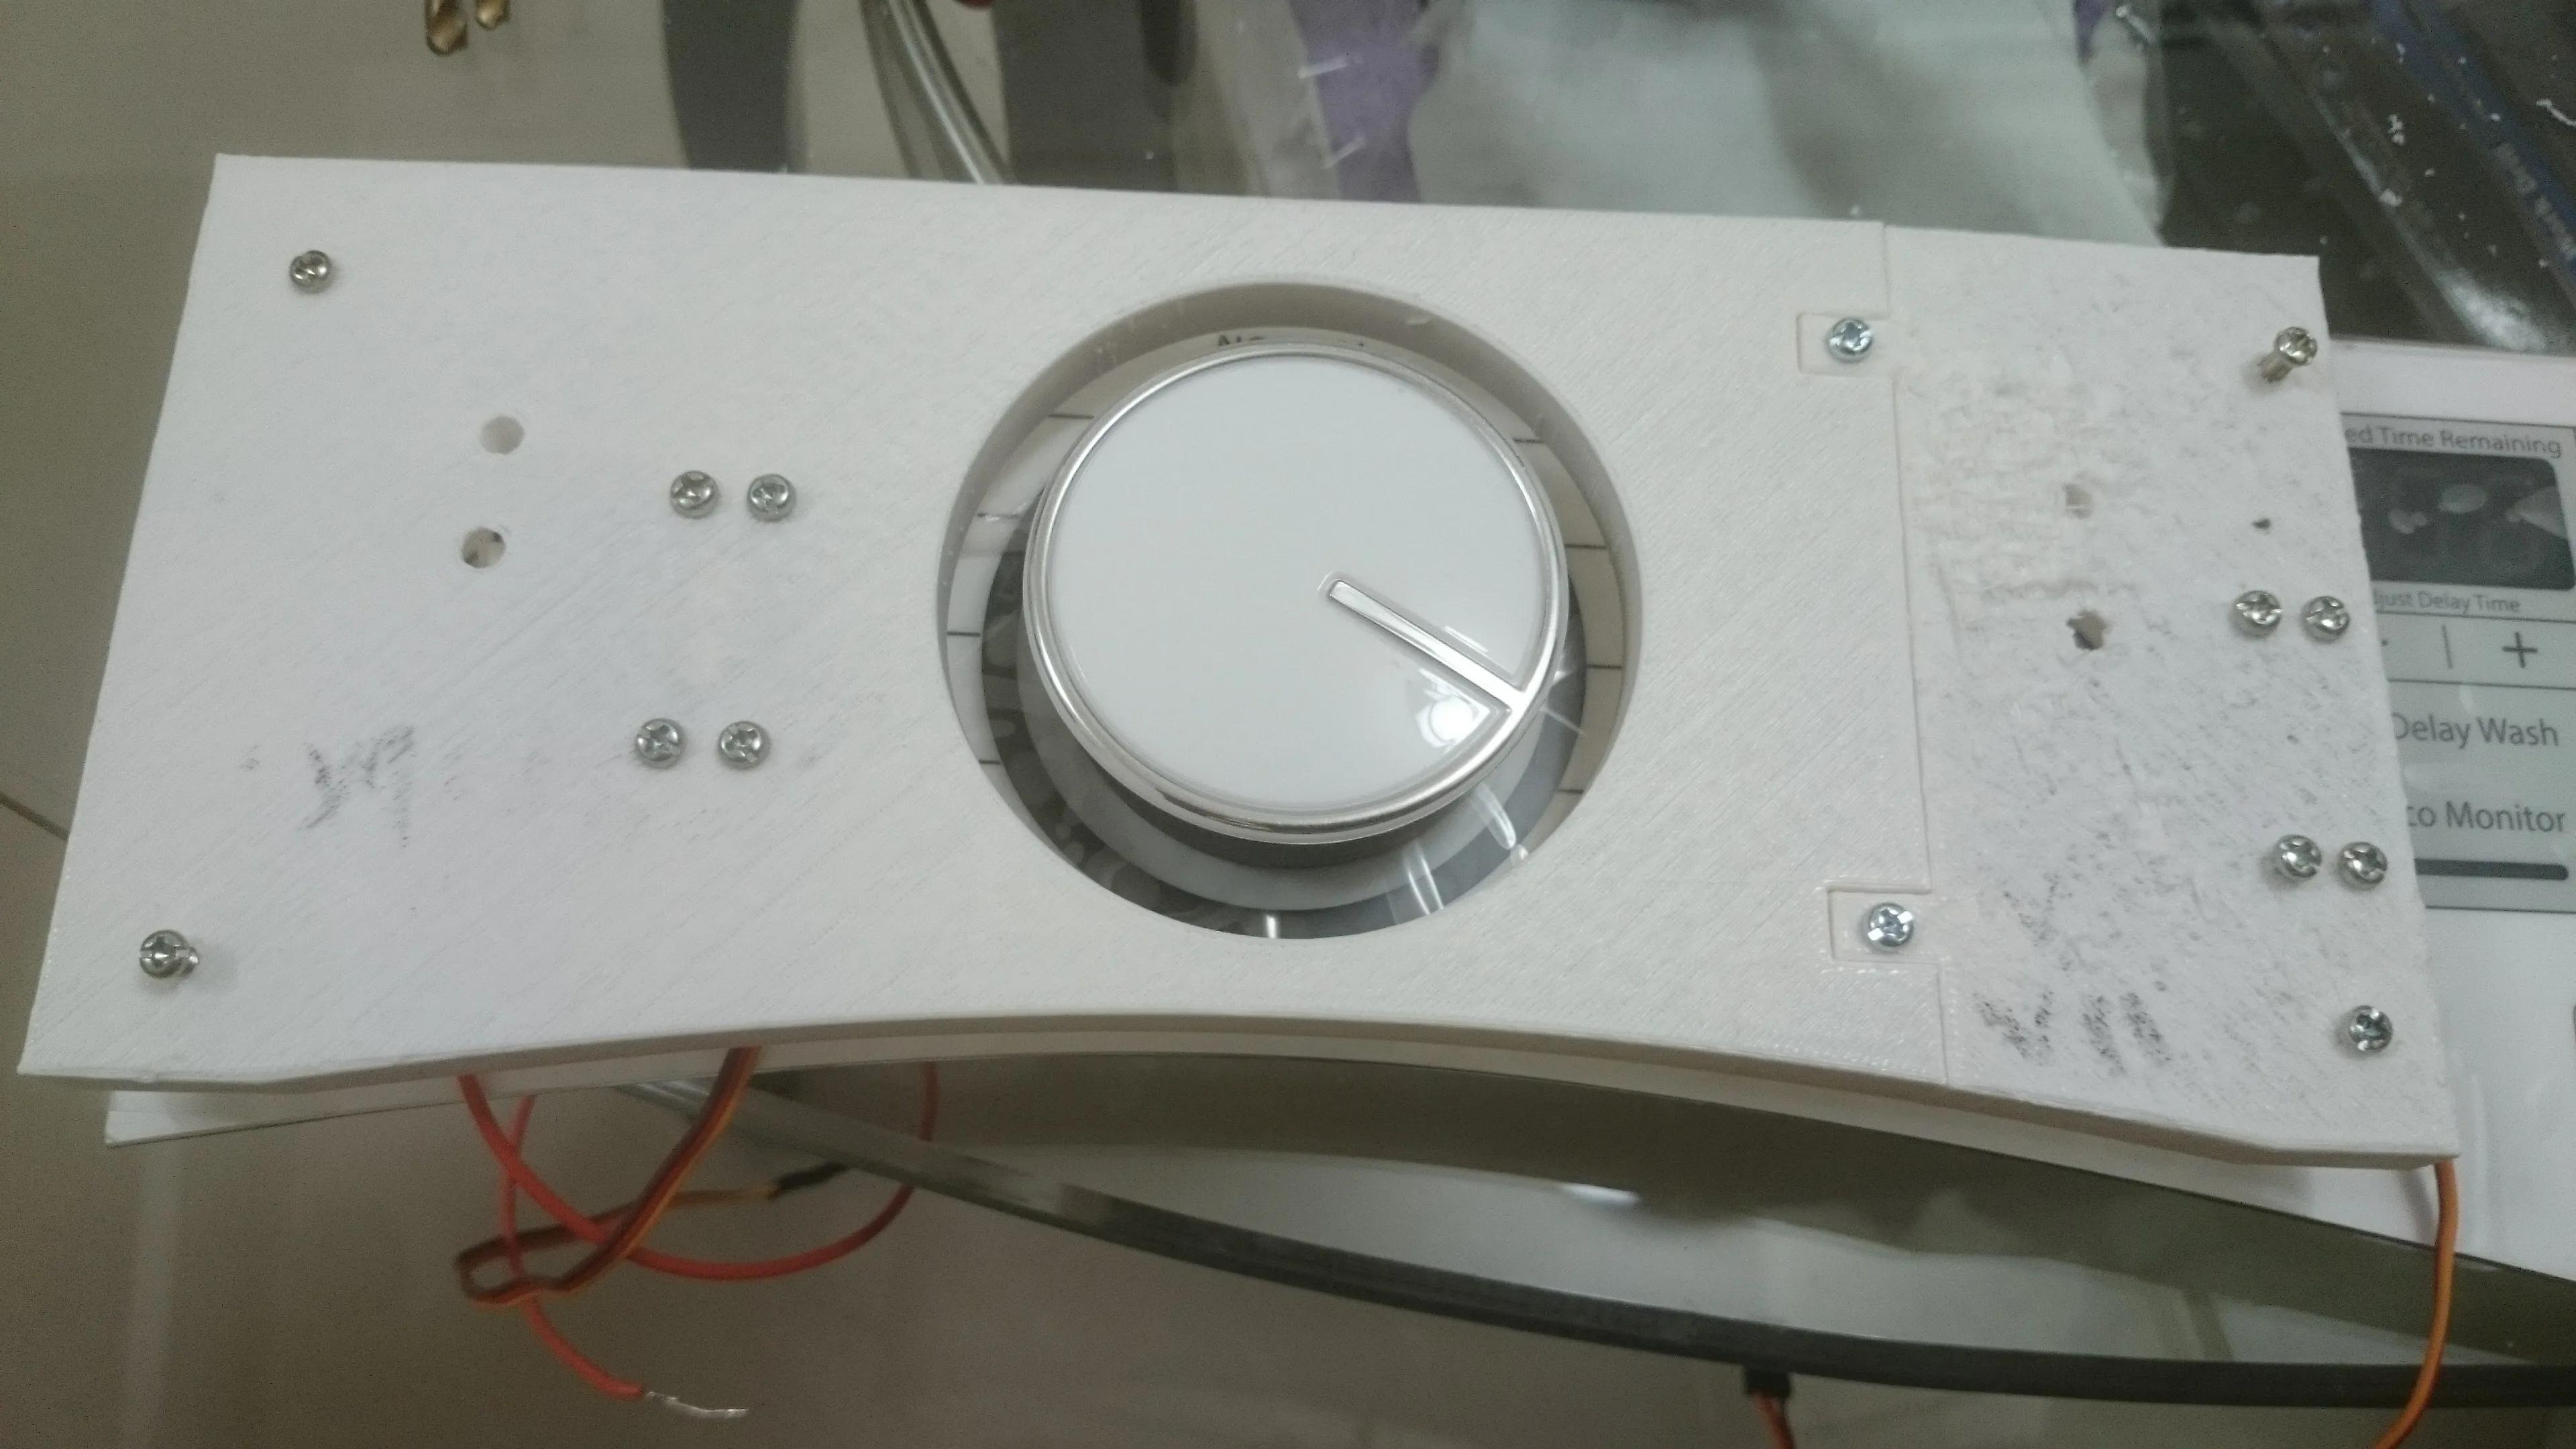 With Control Panel Detail
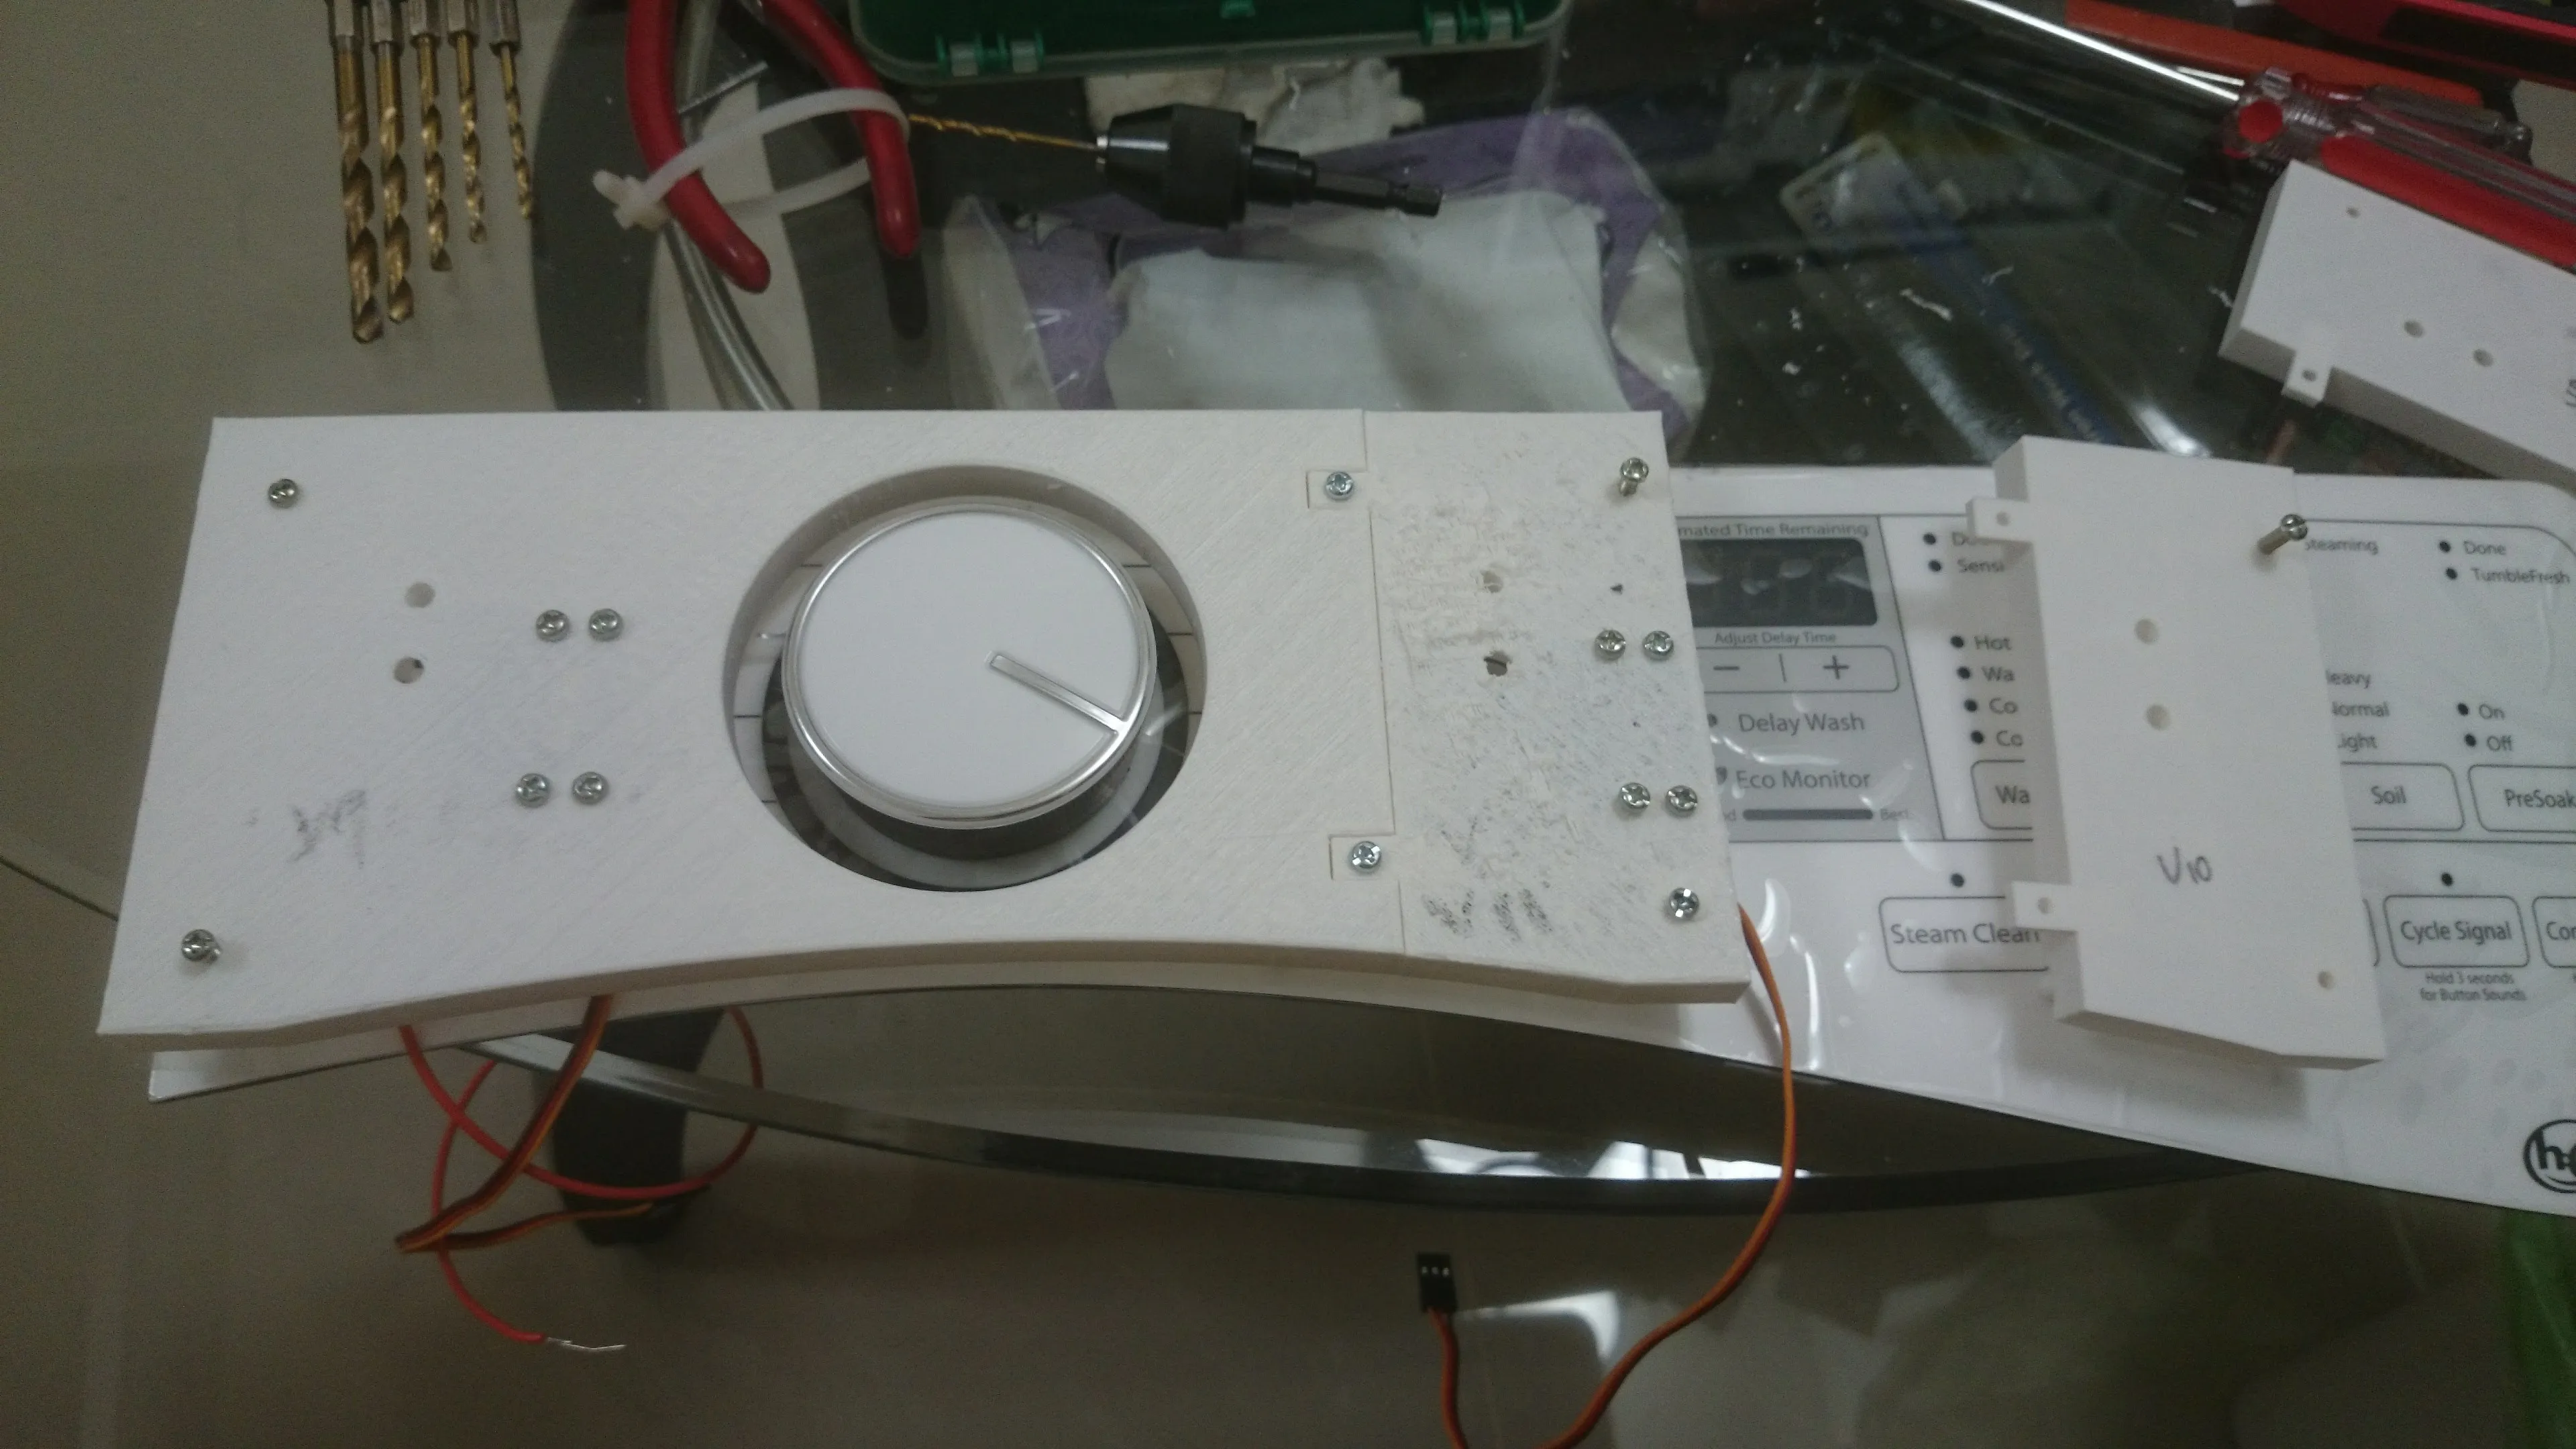 With Control Panel
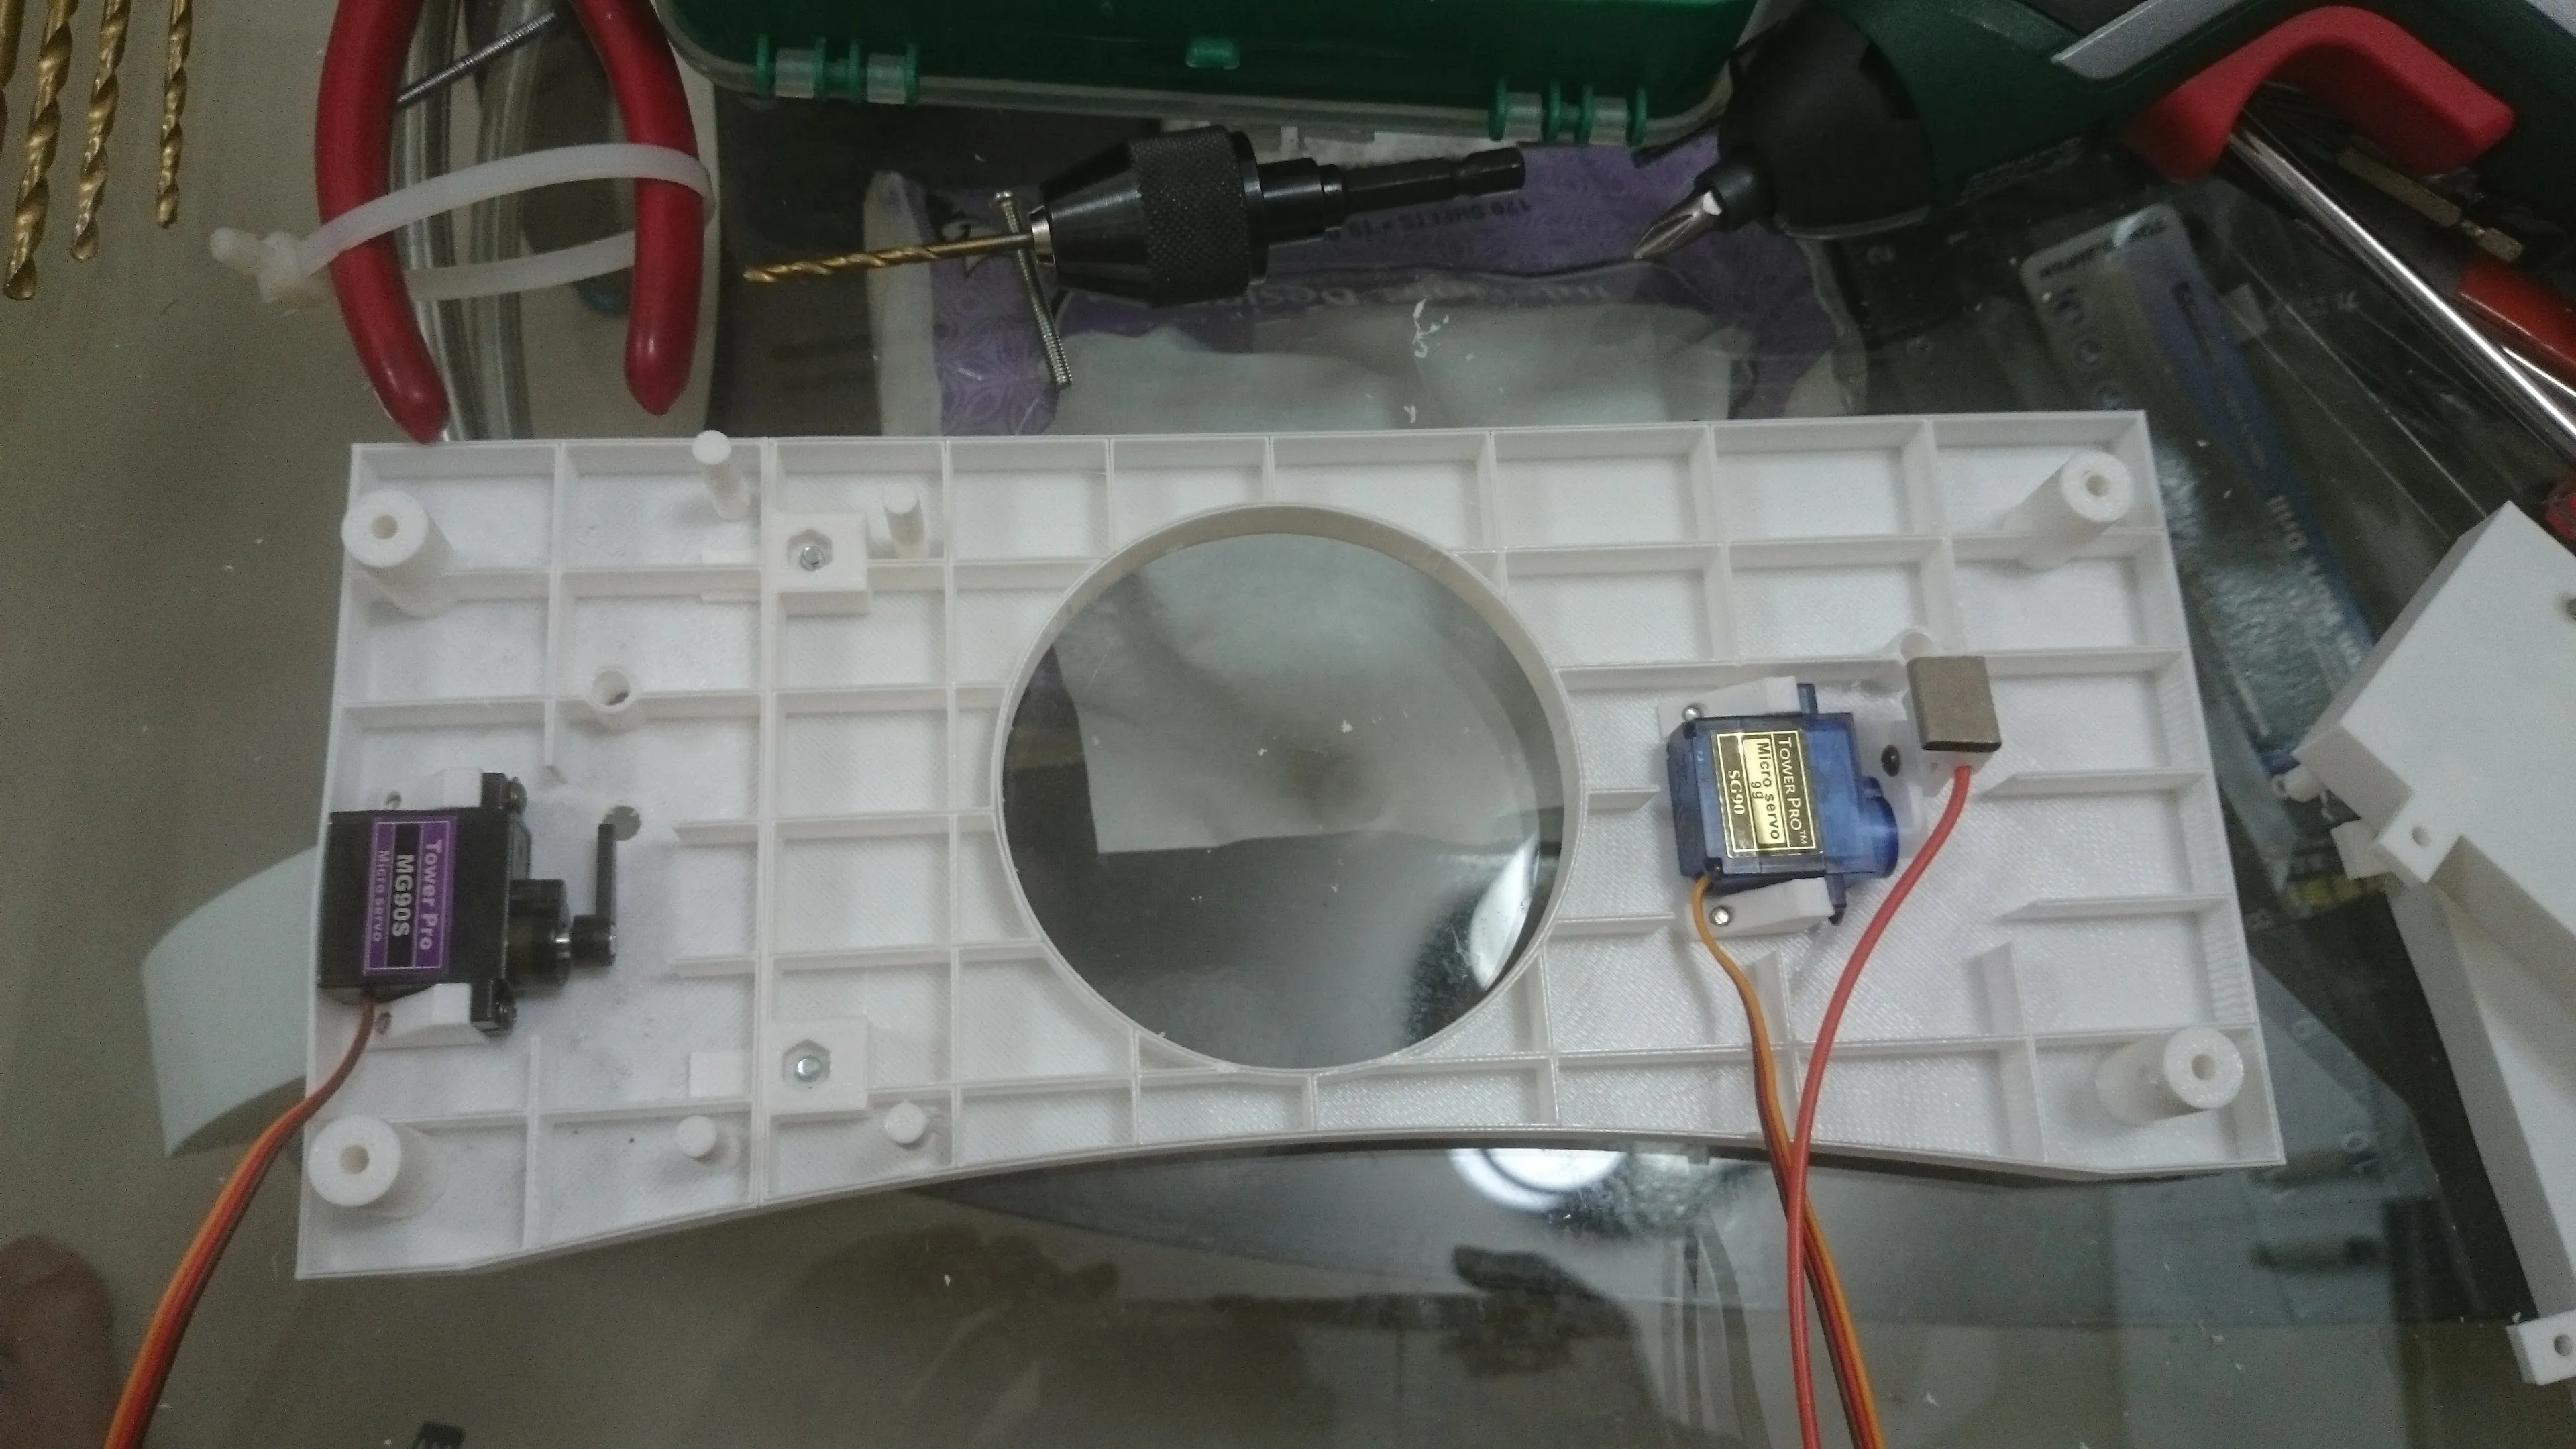 Frame Back View
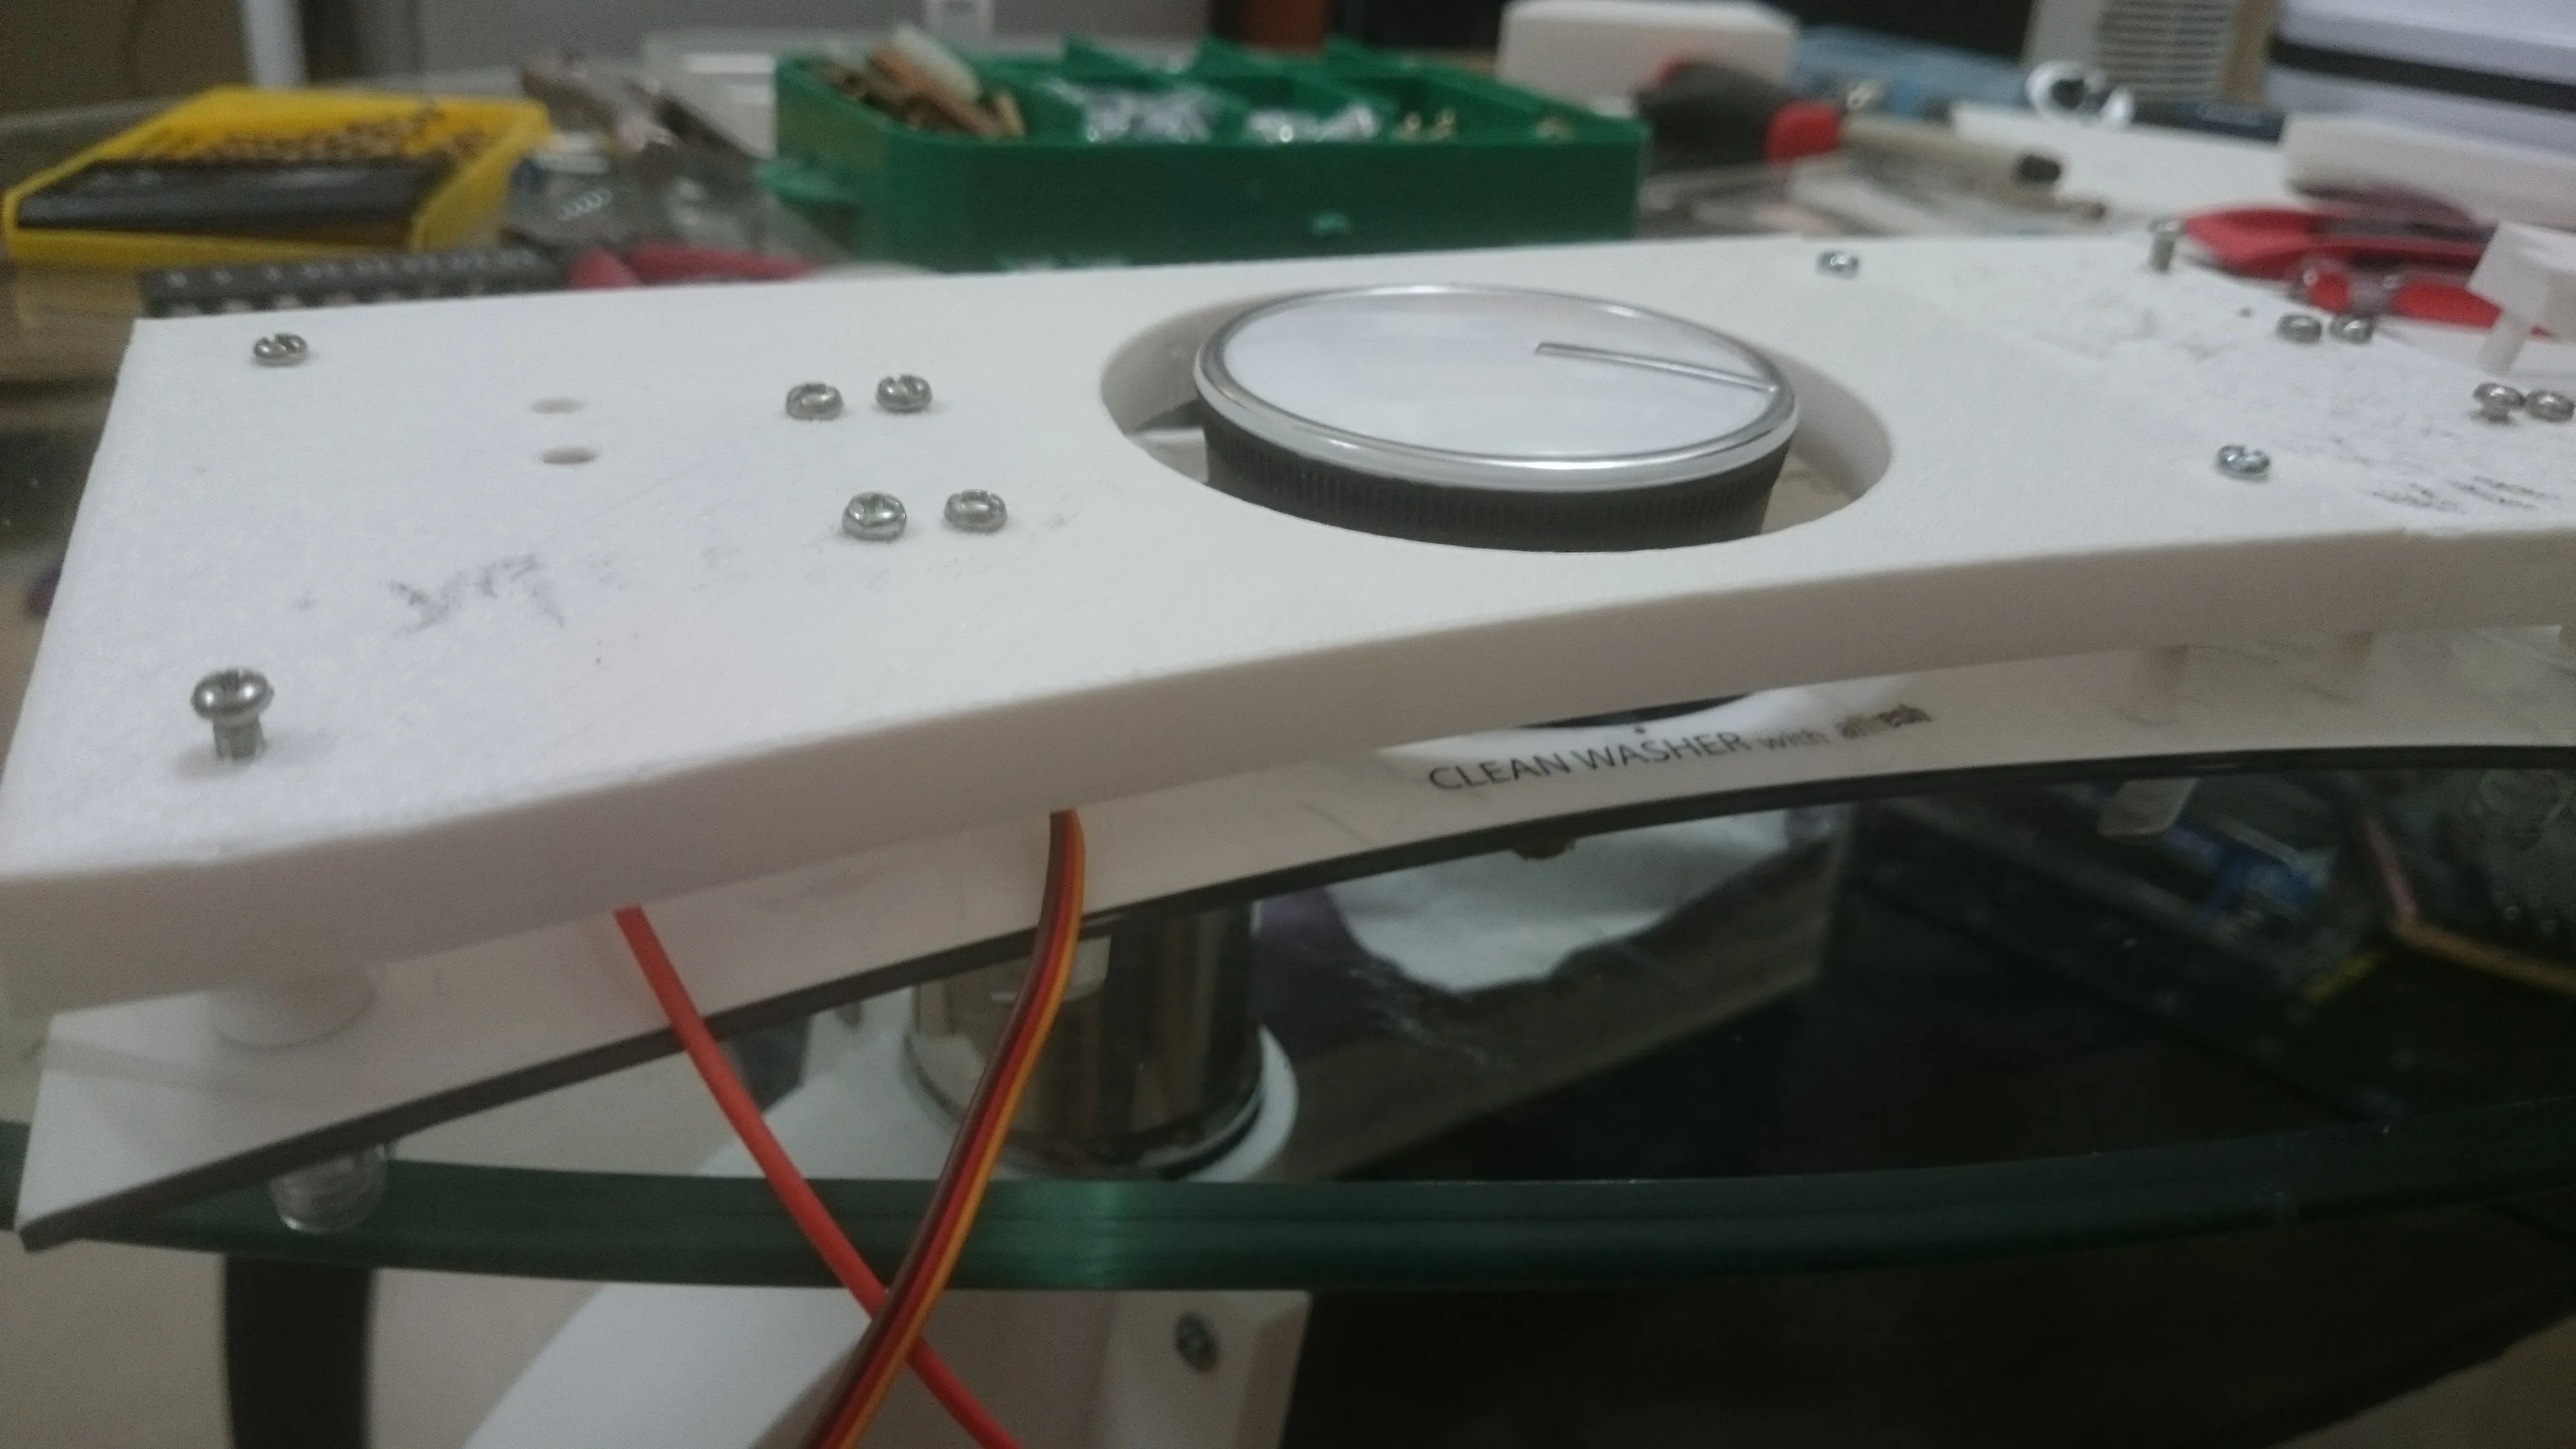 Frame Side View
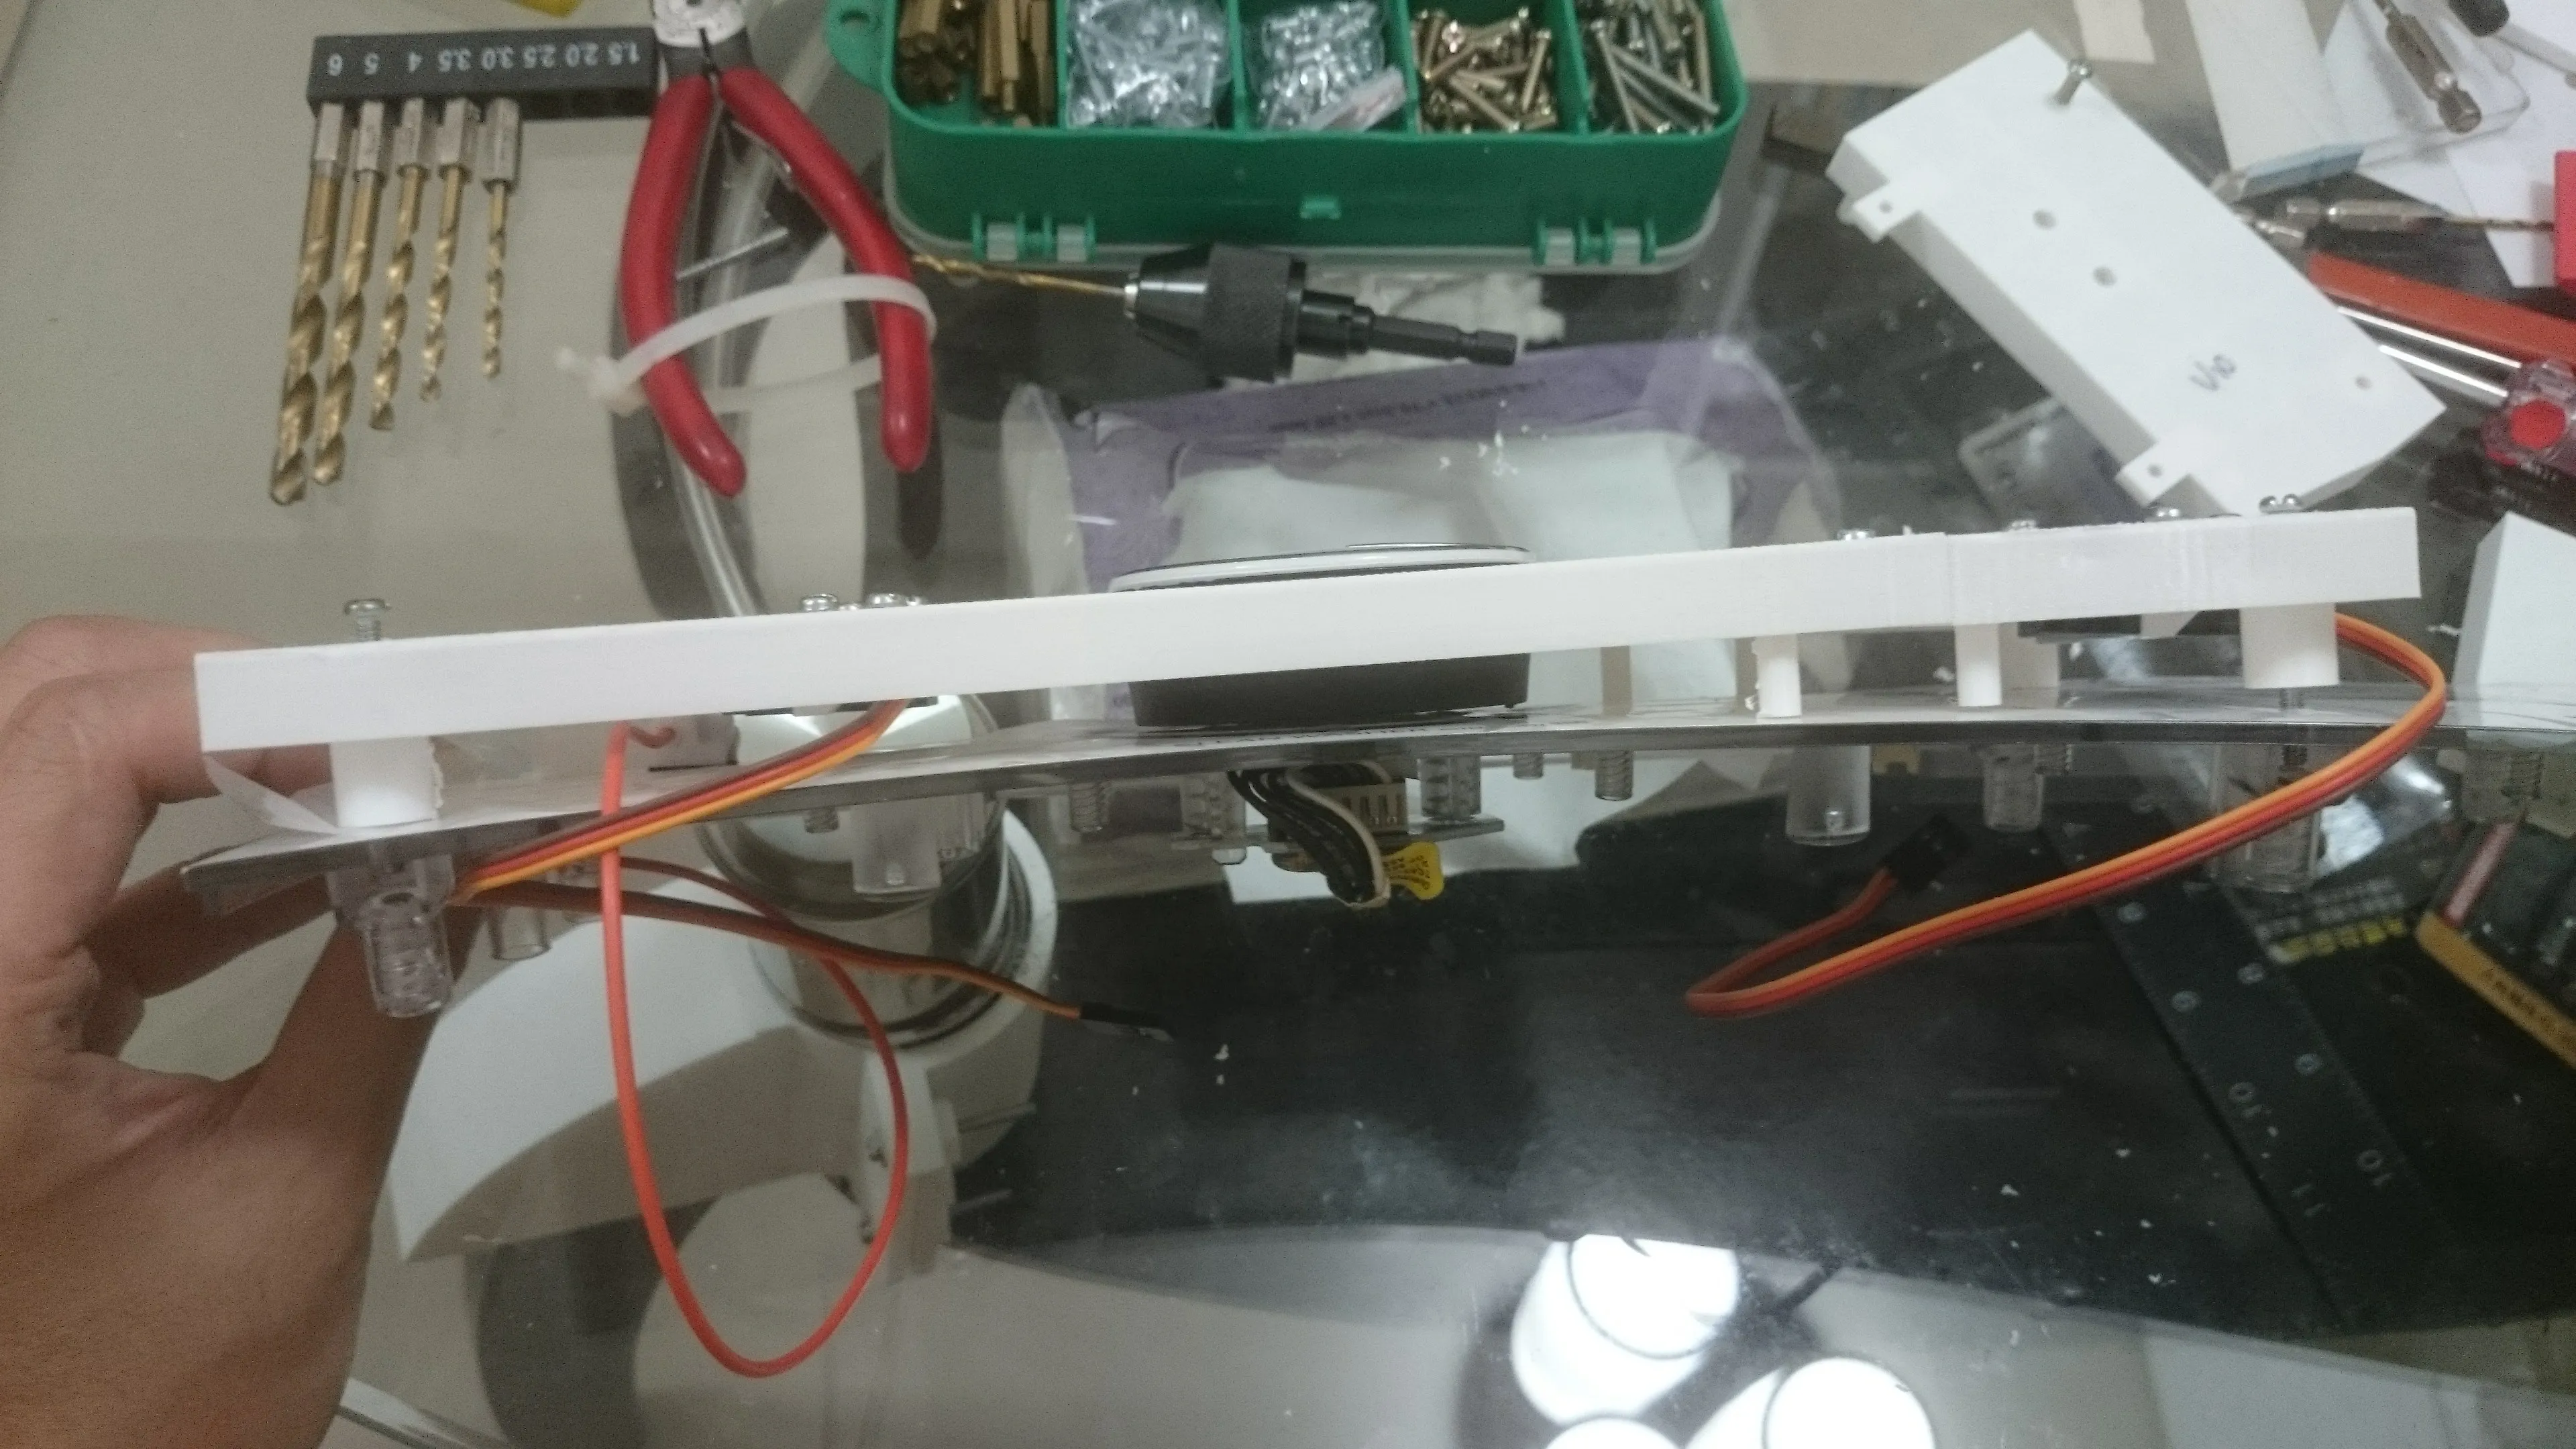 Frame Side View
Drying Machine
 Frame Assembling
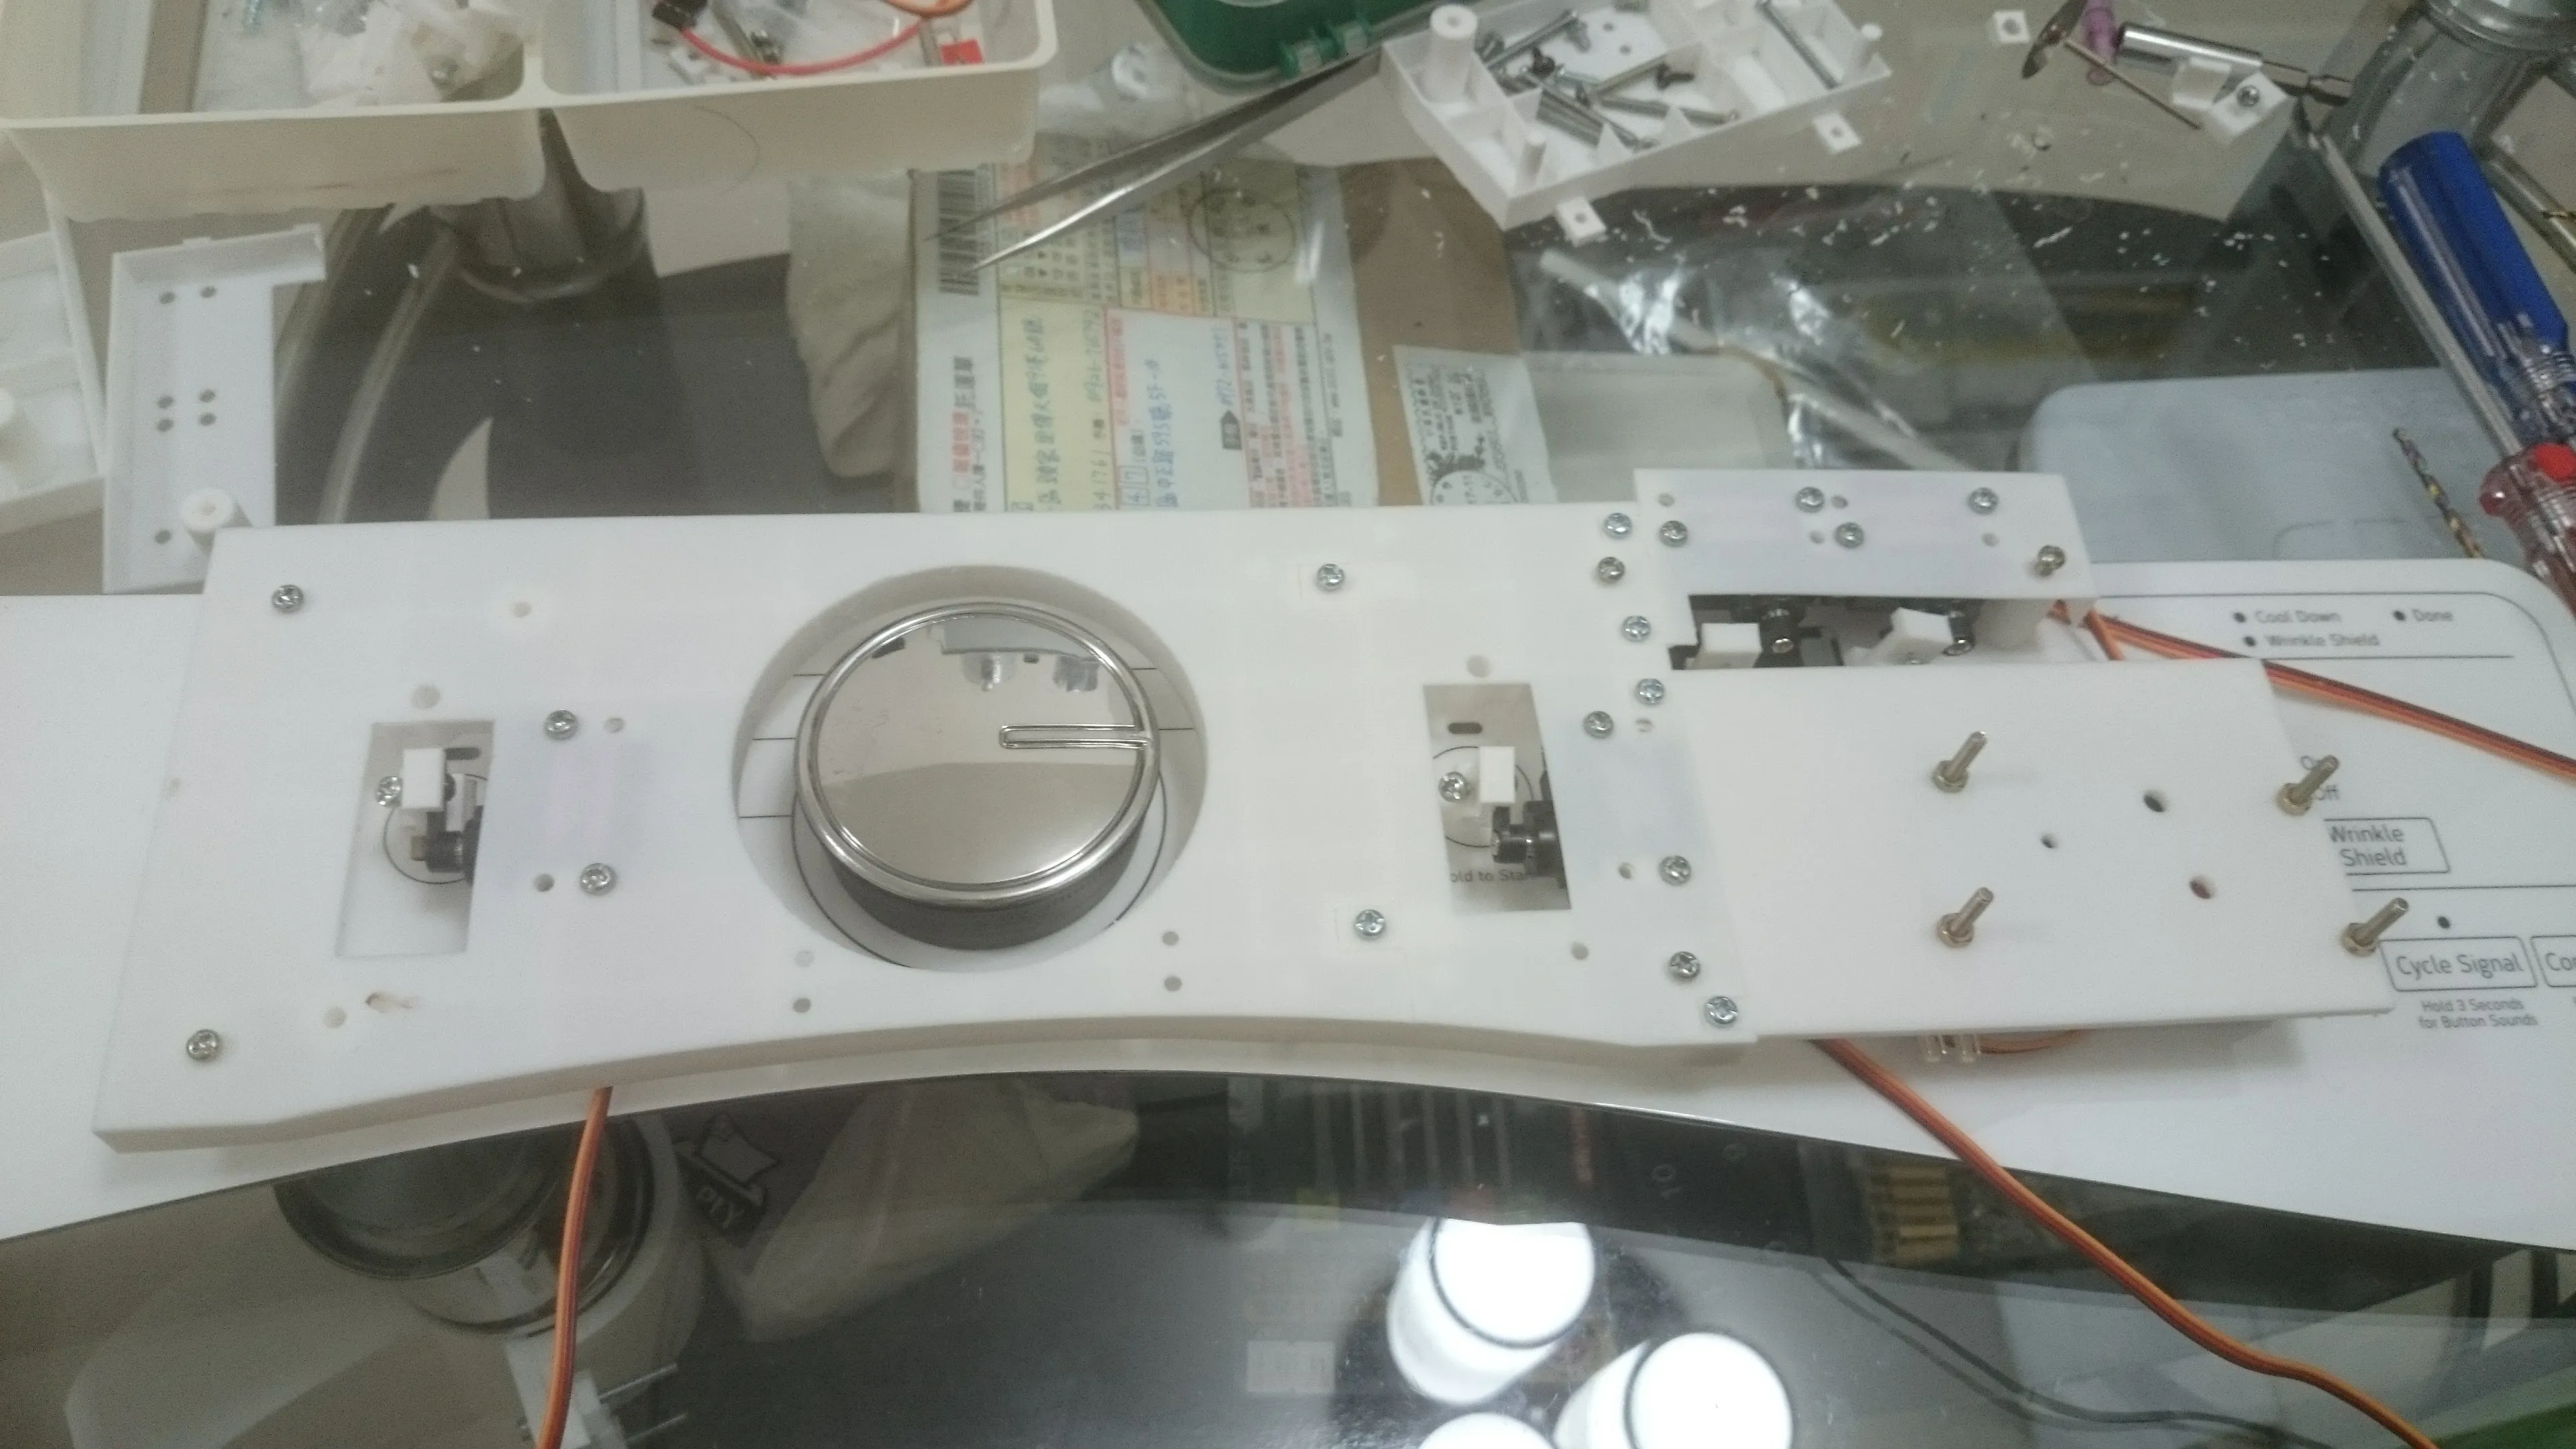 With Control Panel Detail
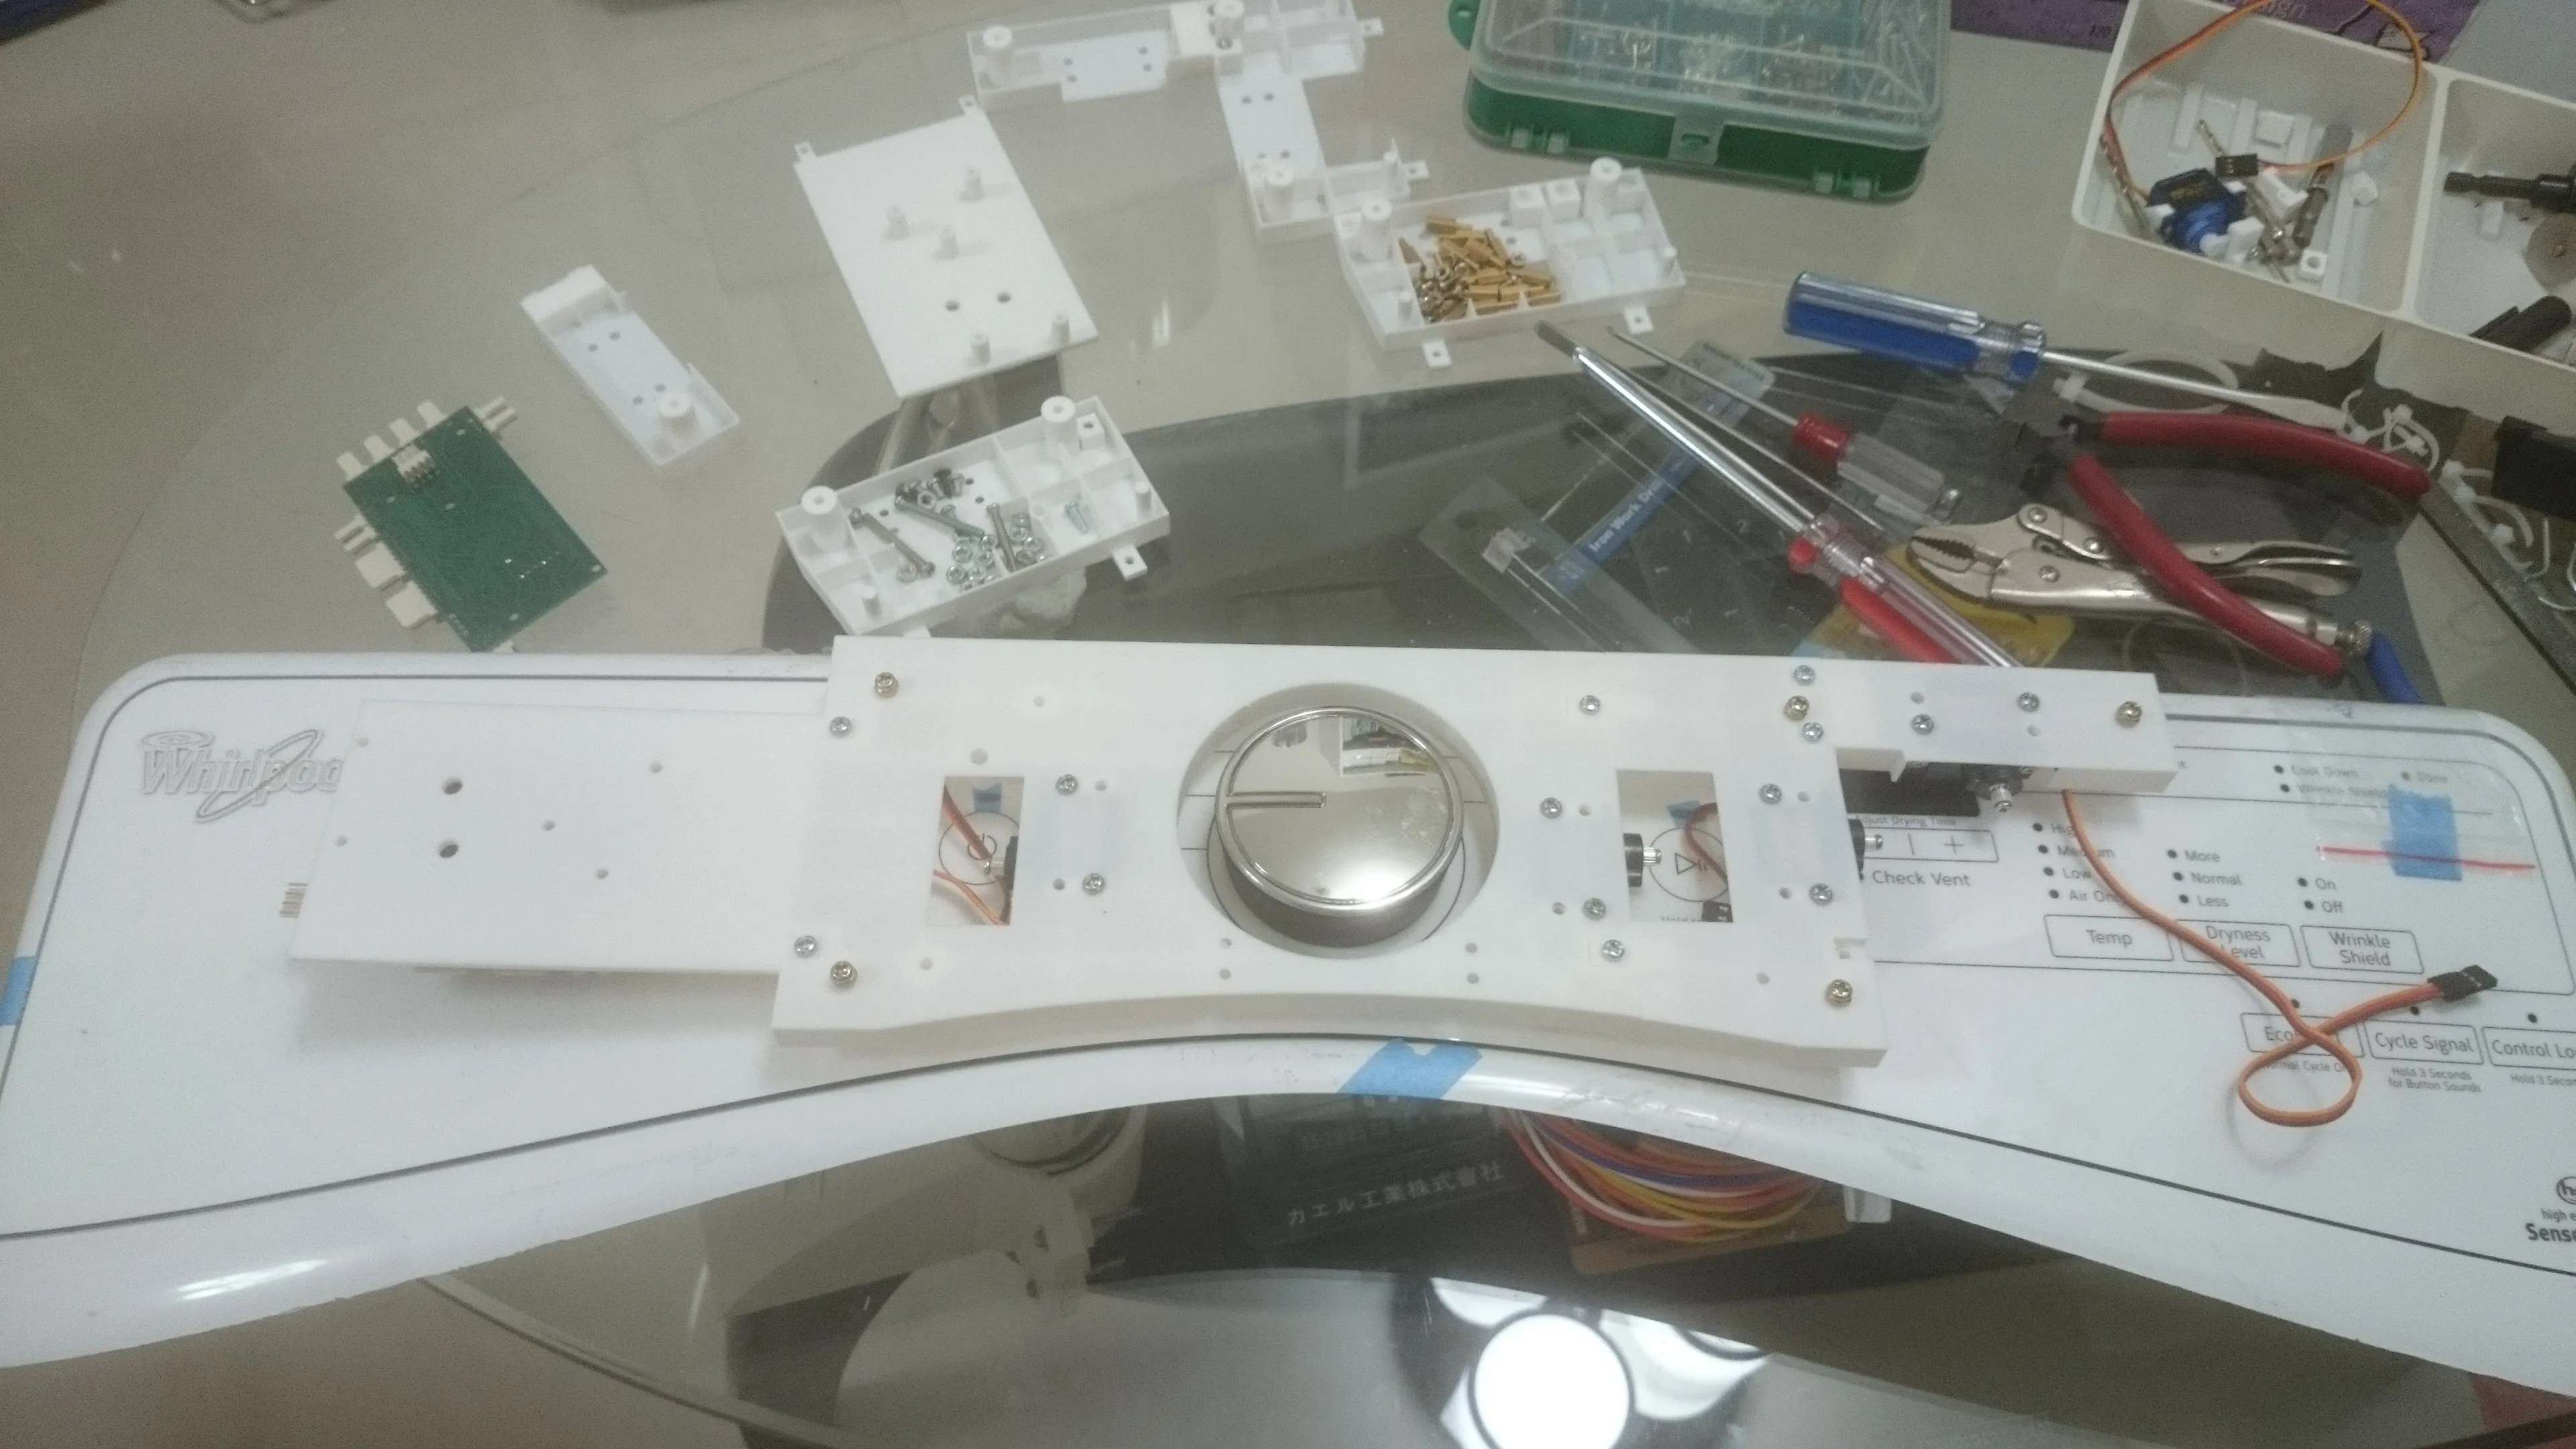 With Control Panel
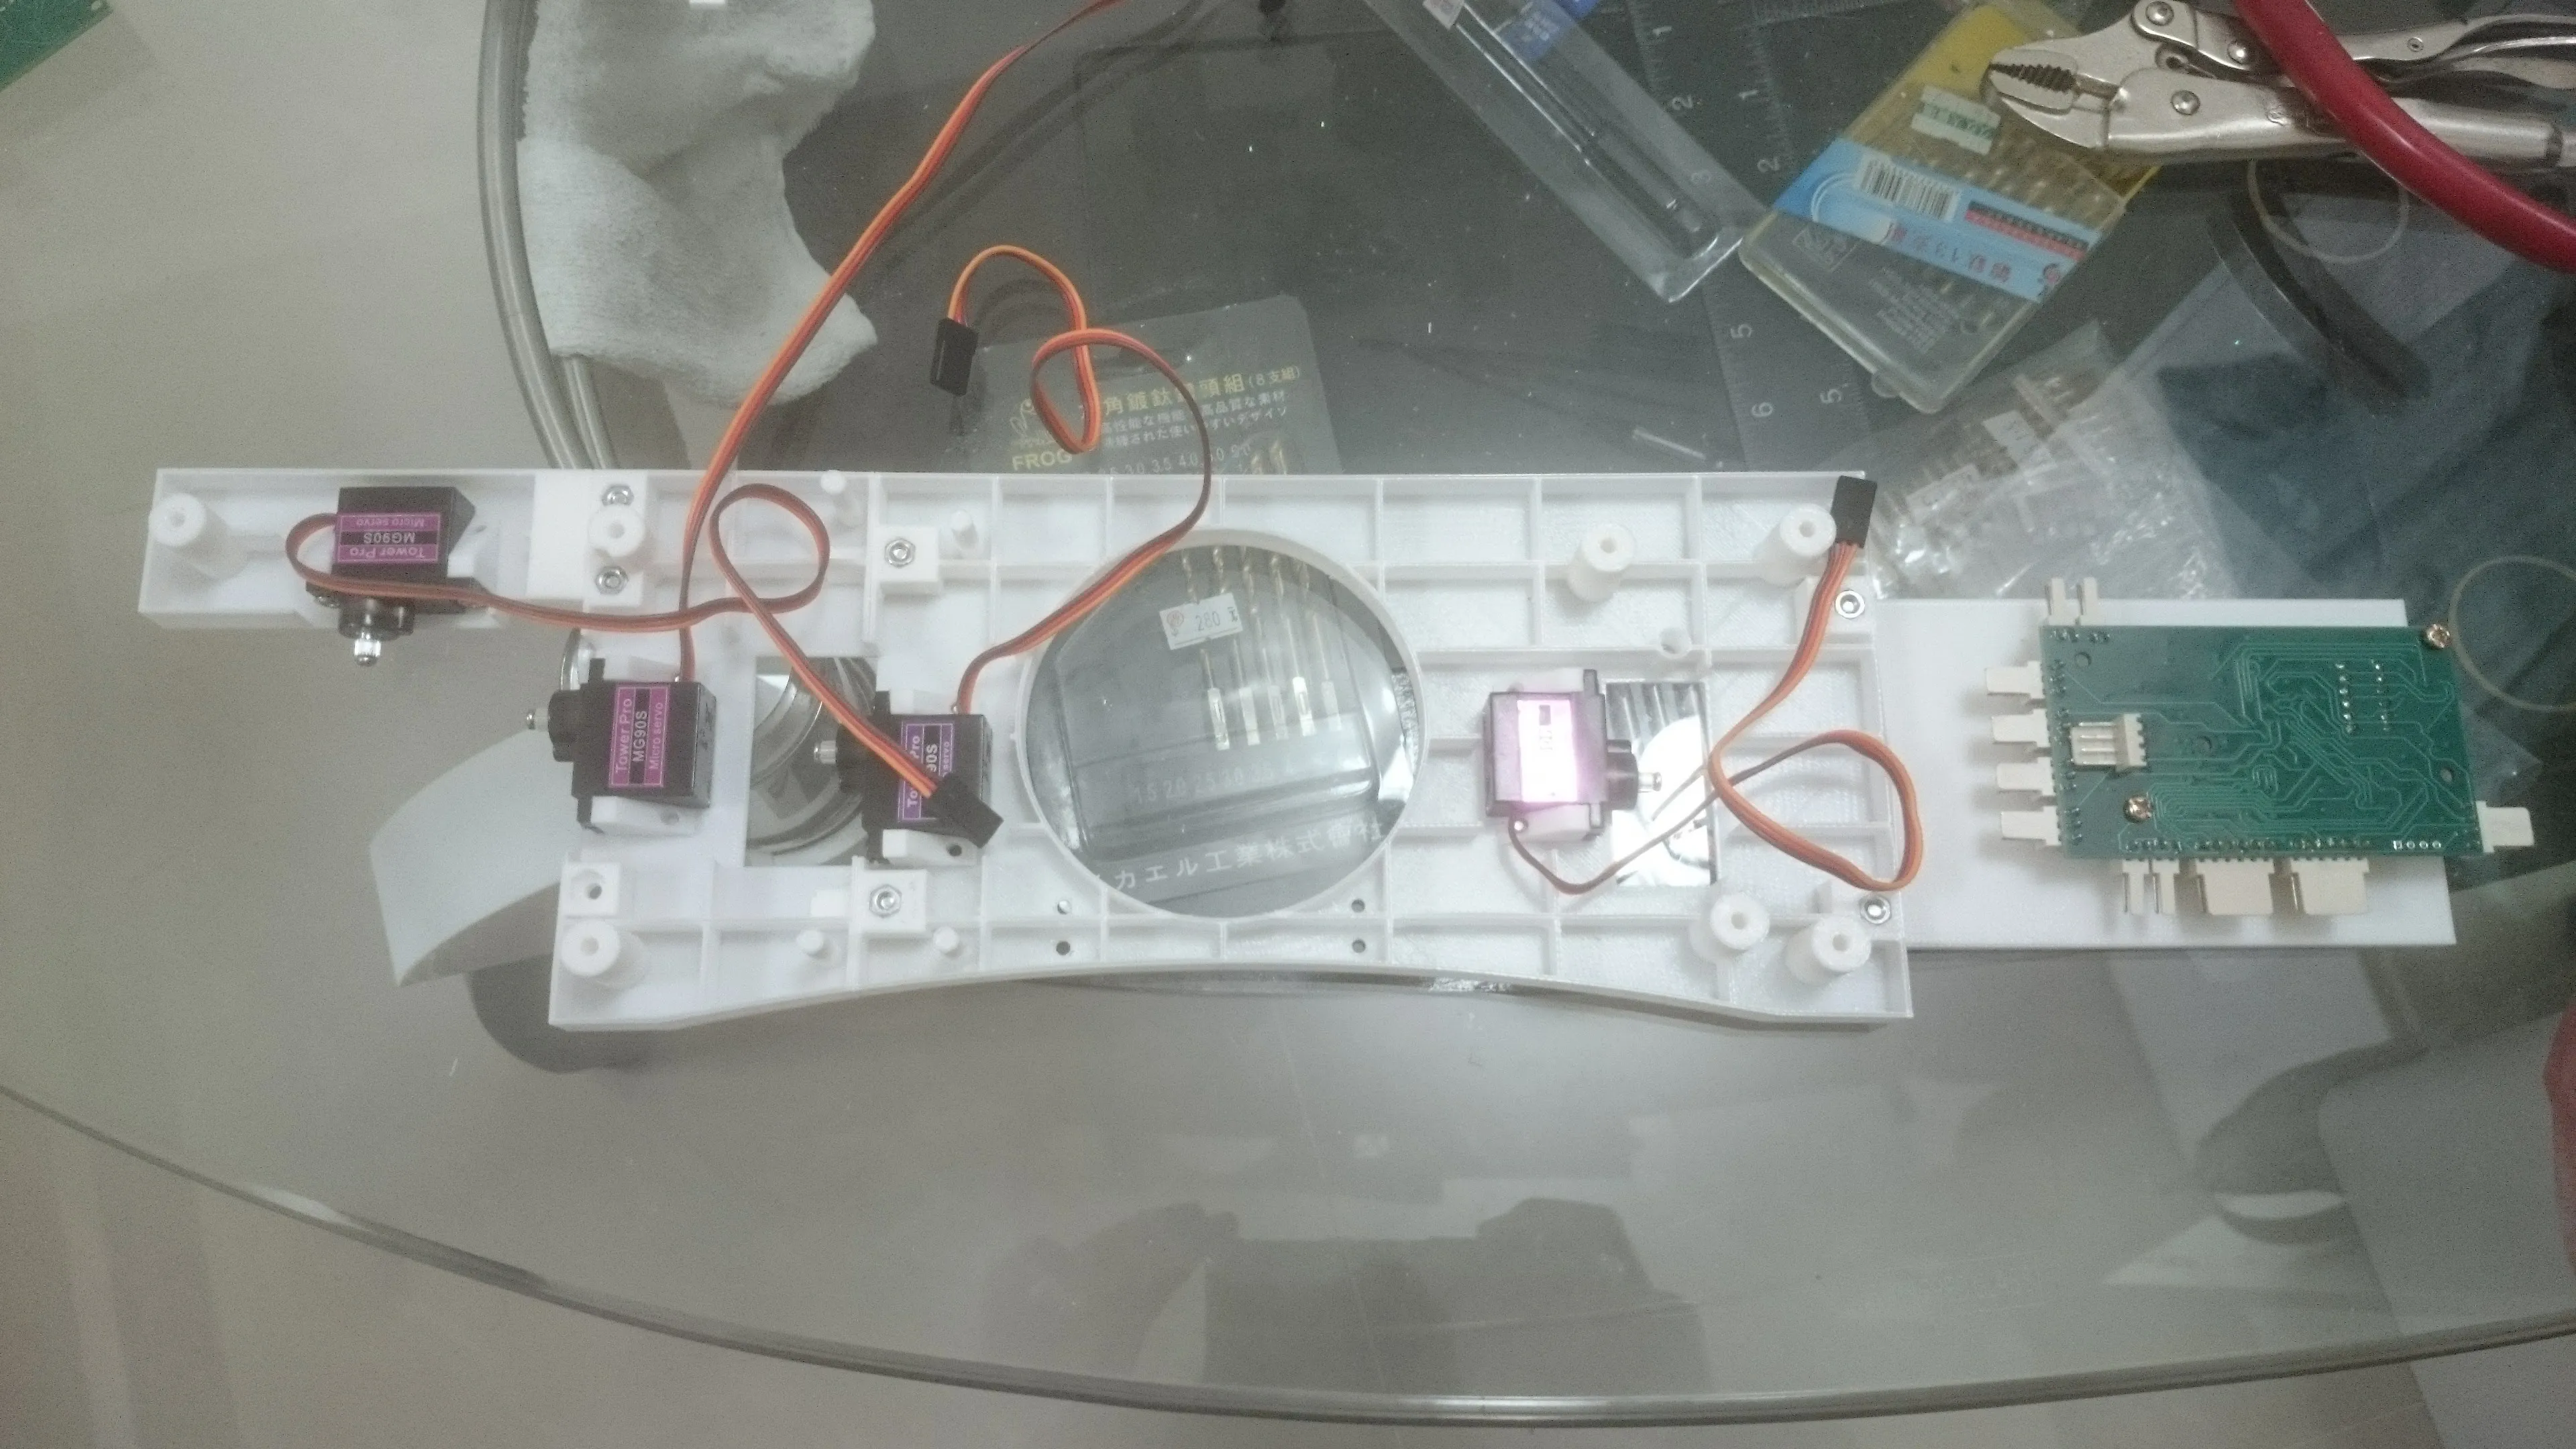 Frame Back View
 Some Details
 Some Details
Servo
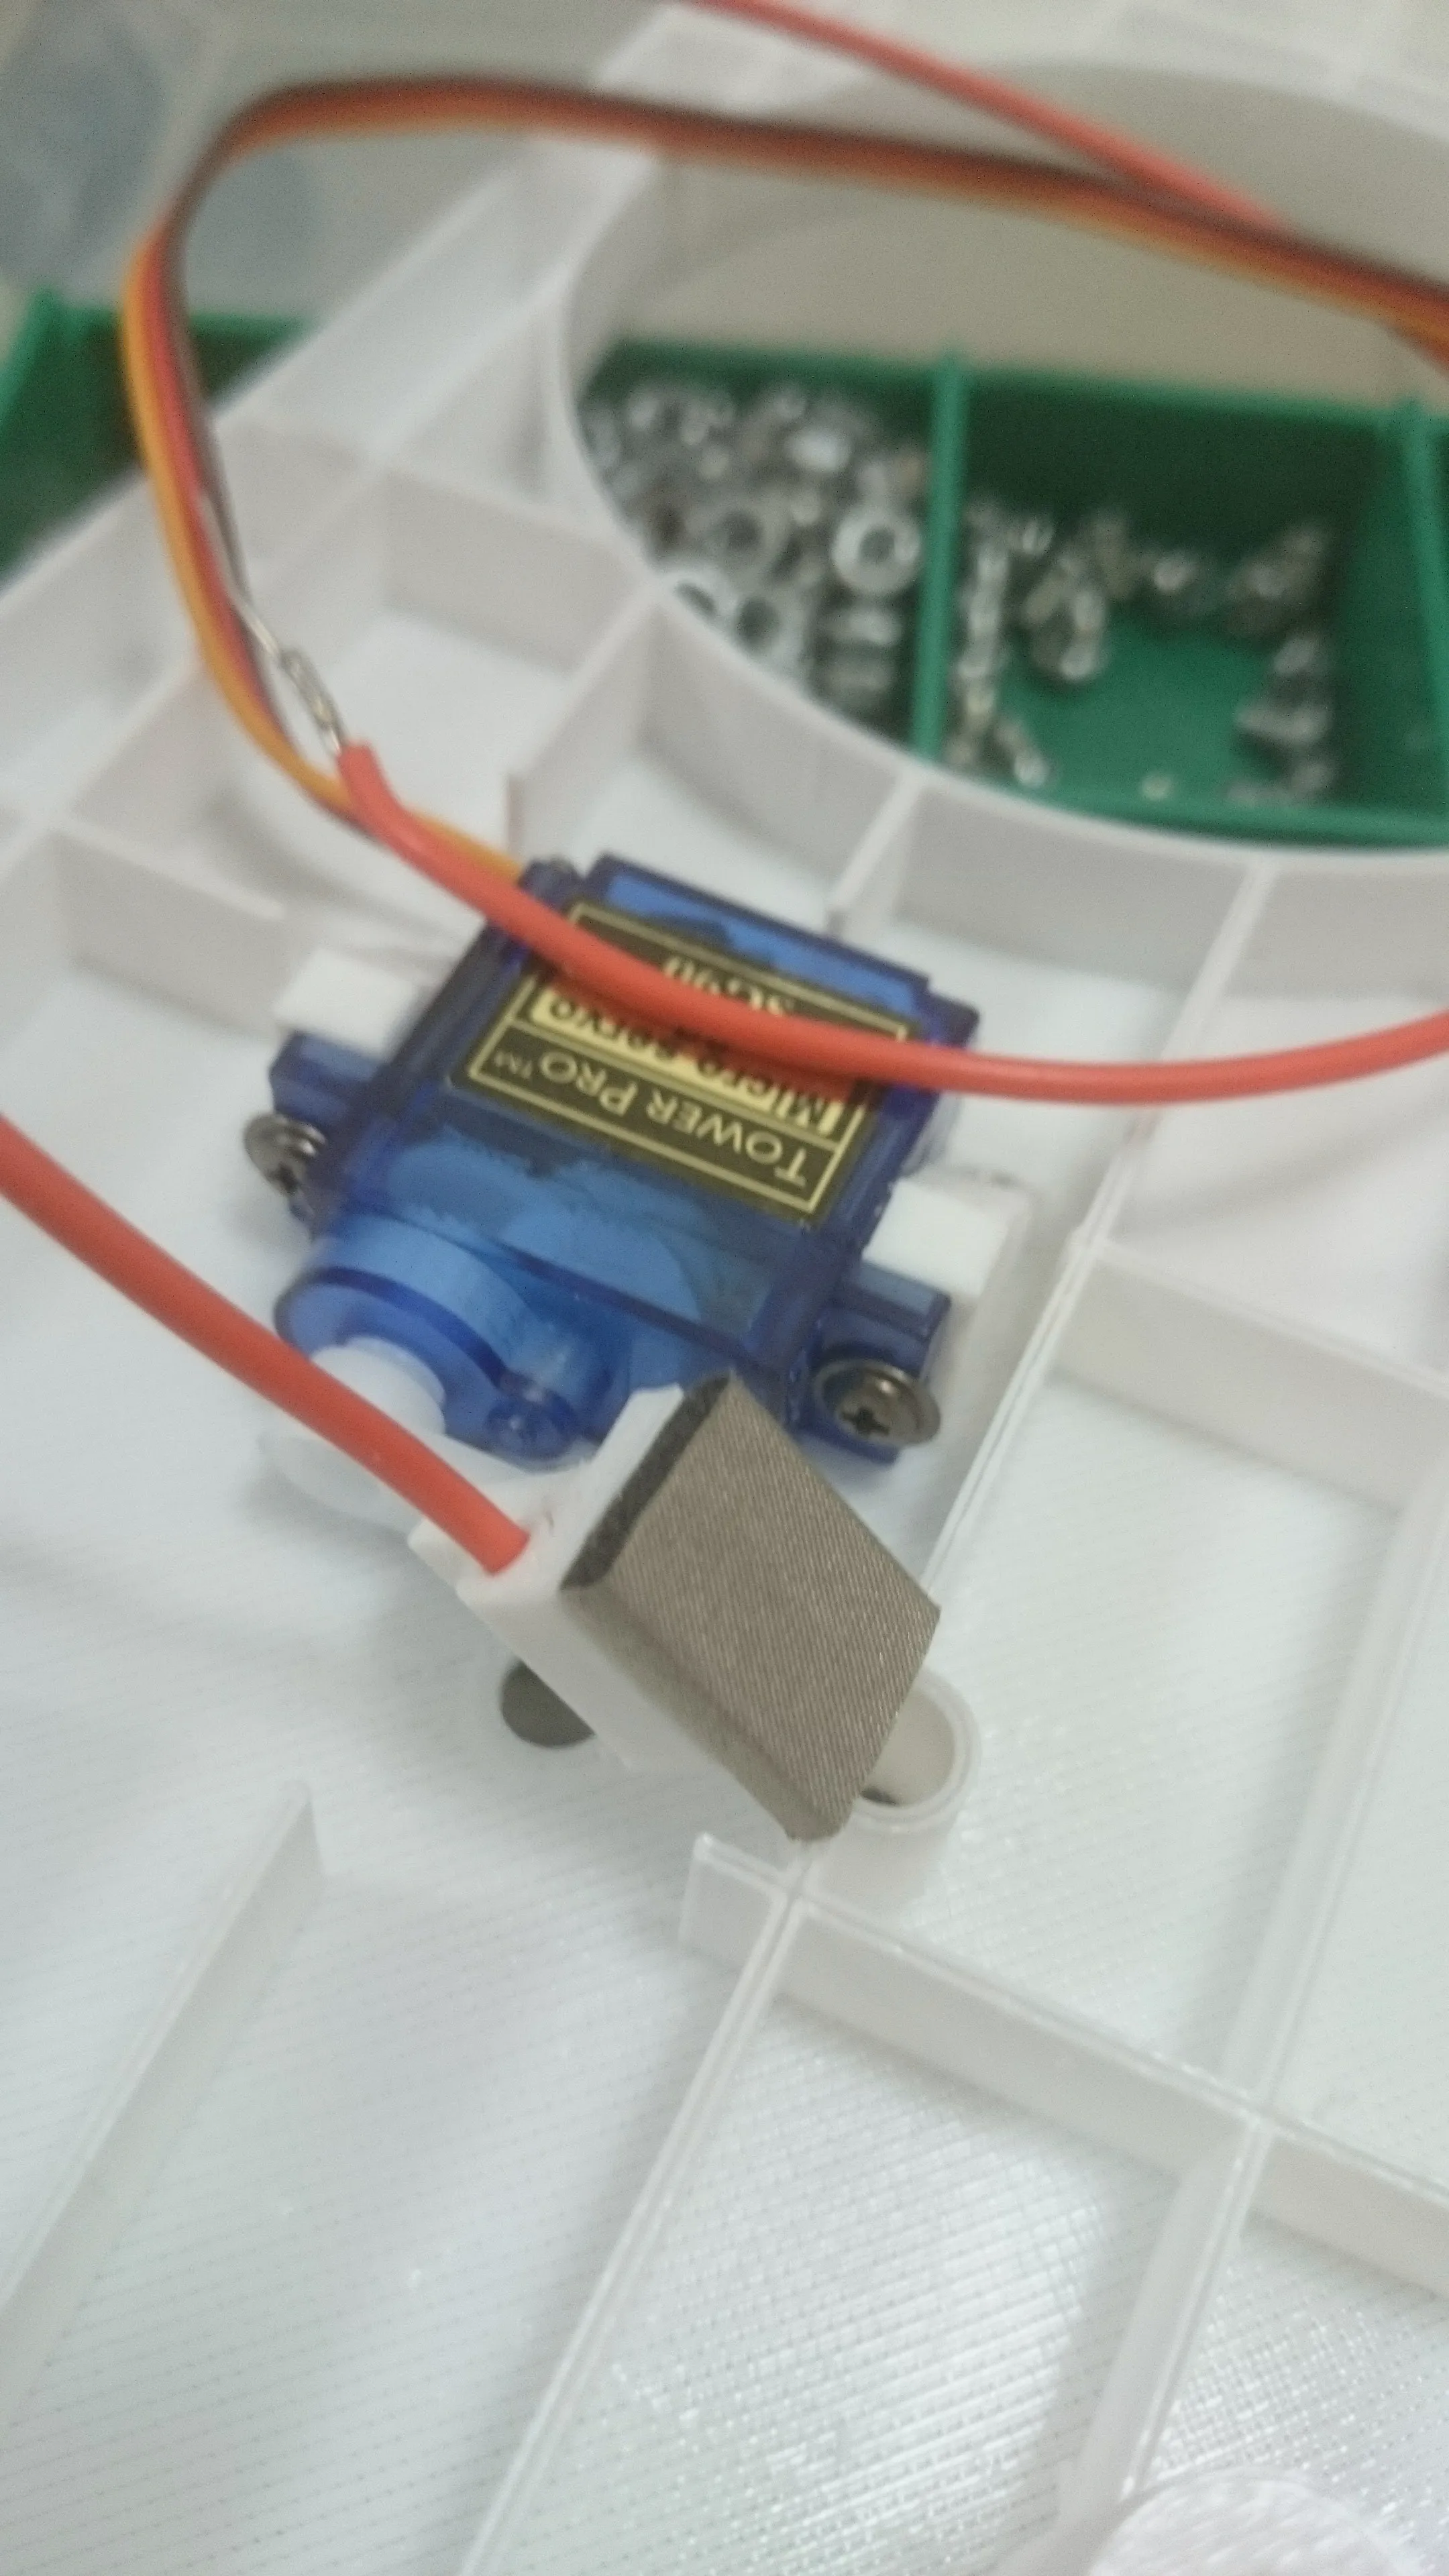 Servo on Frame
 Servo with Electrode
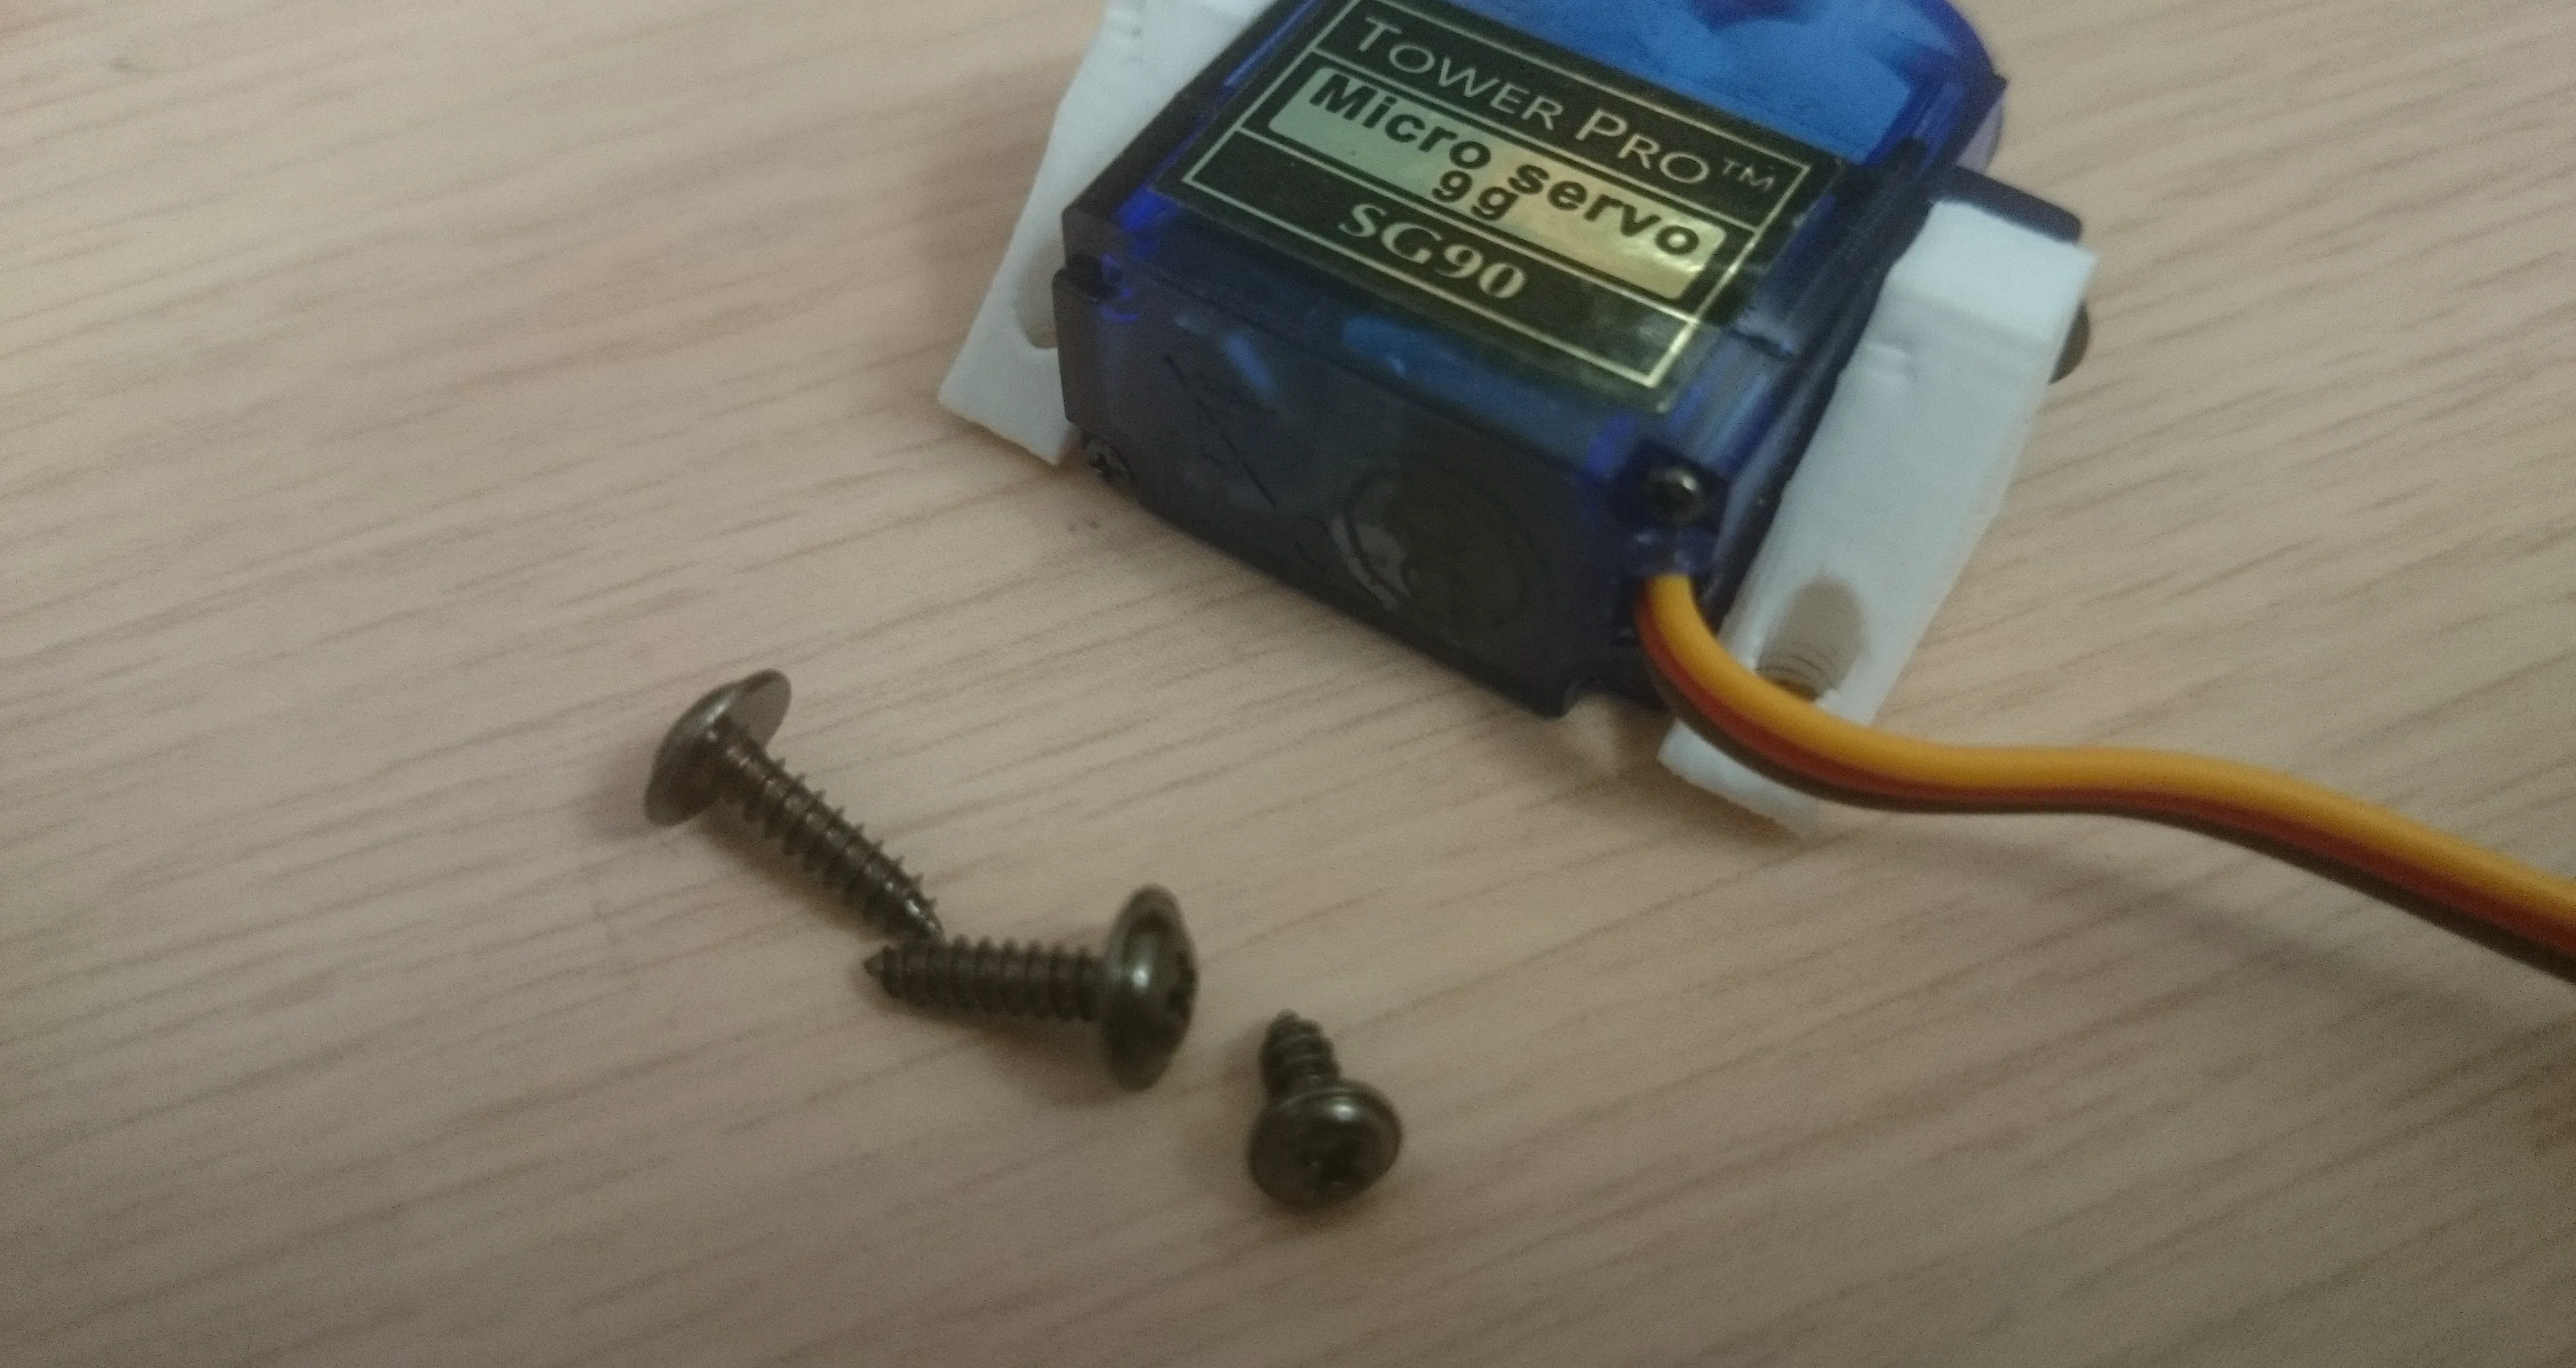 Servo with Supported
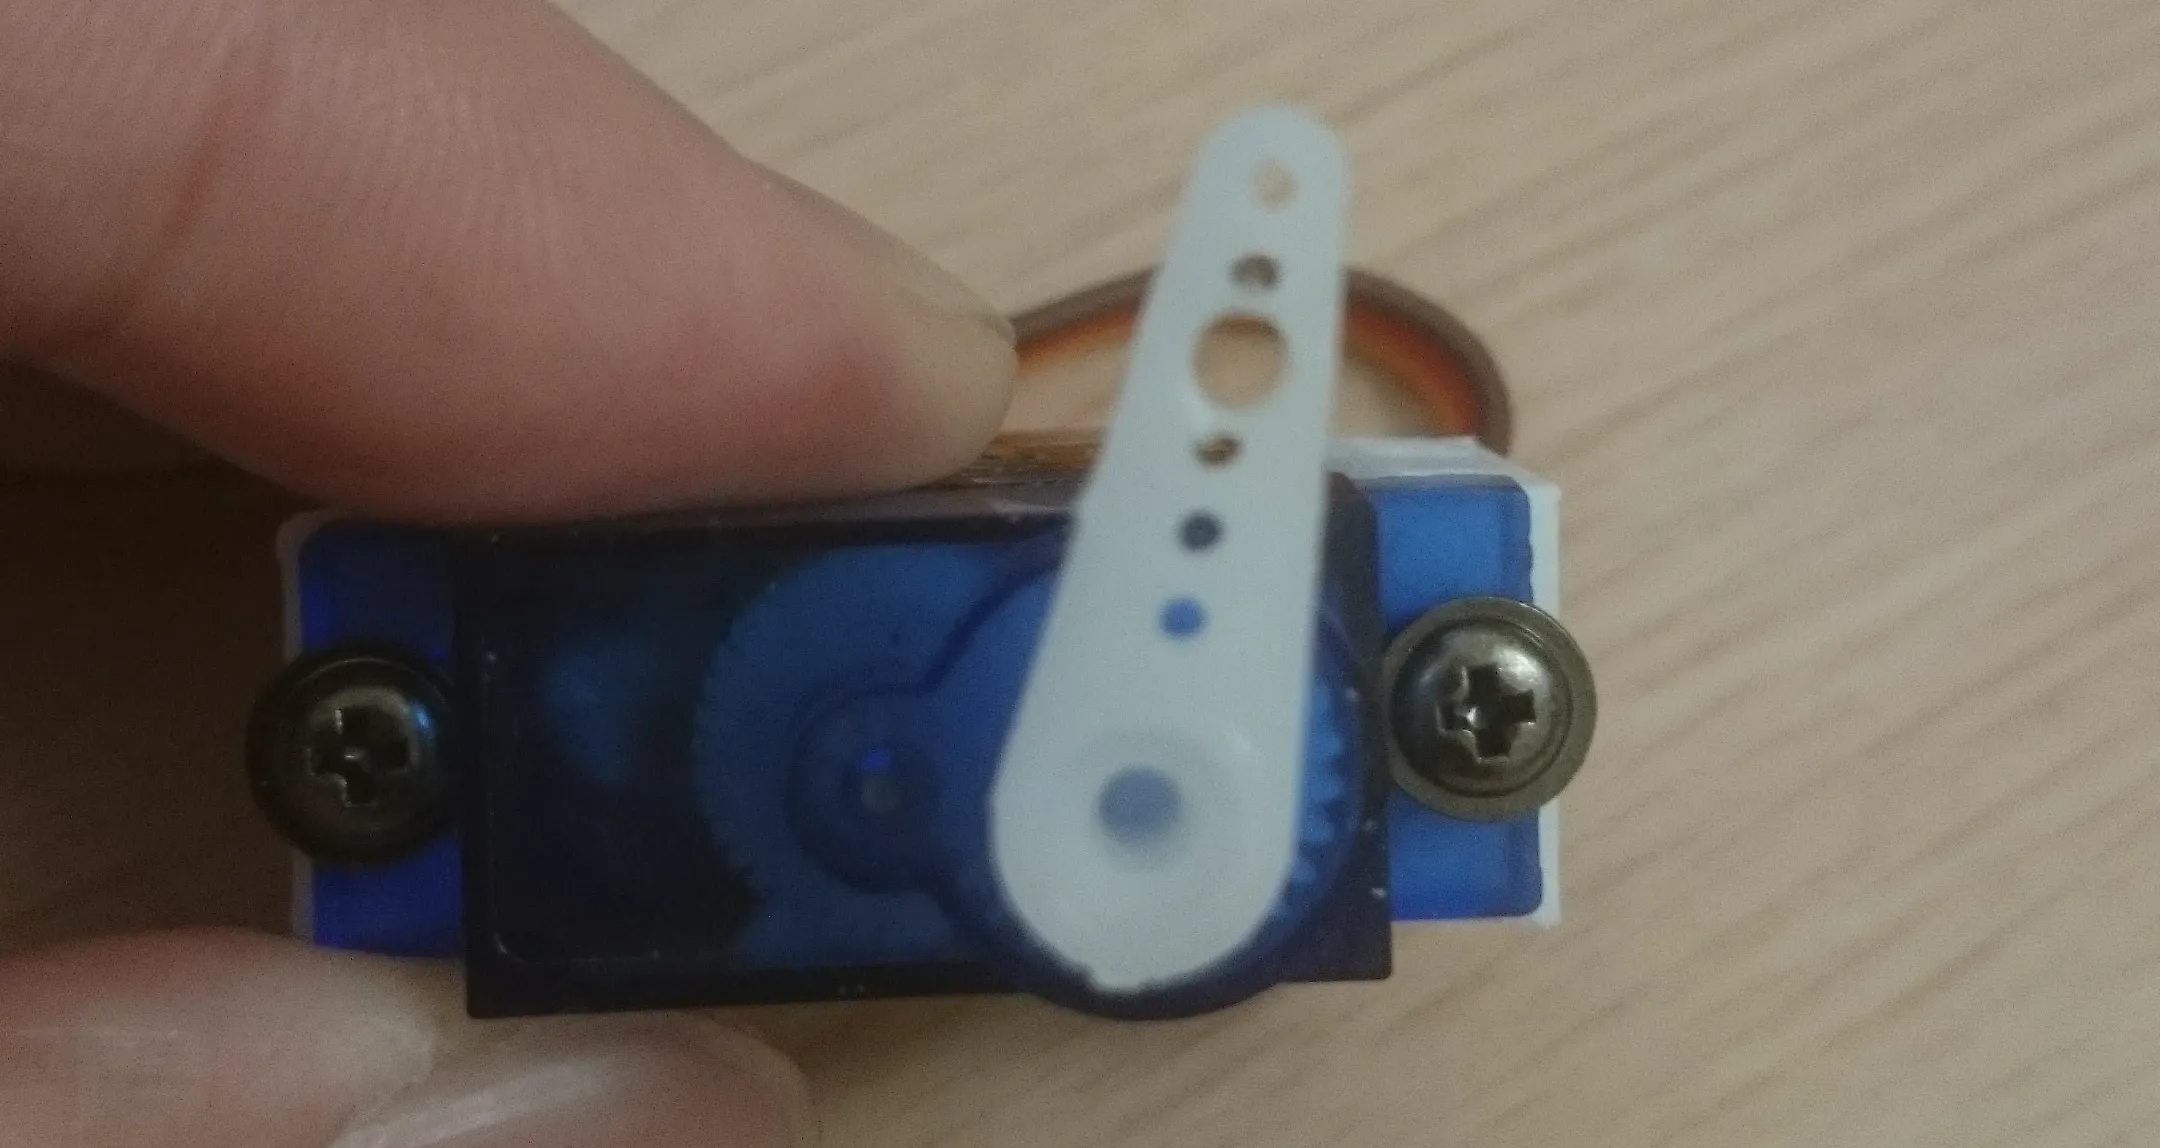 Servo Details
Others
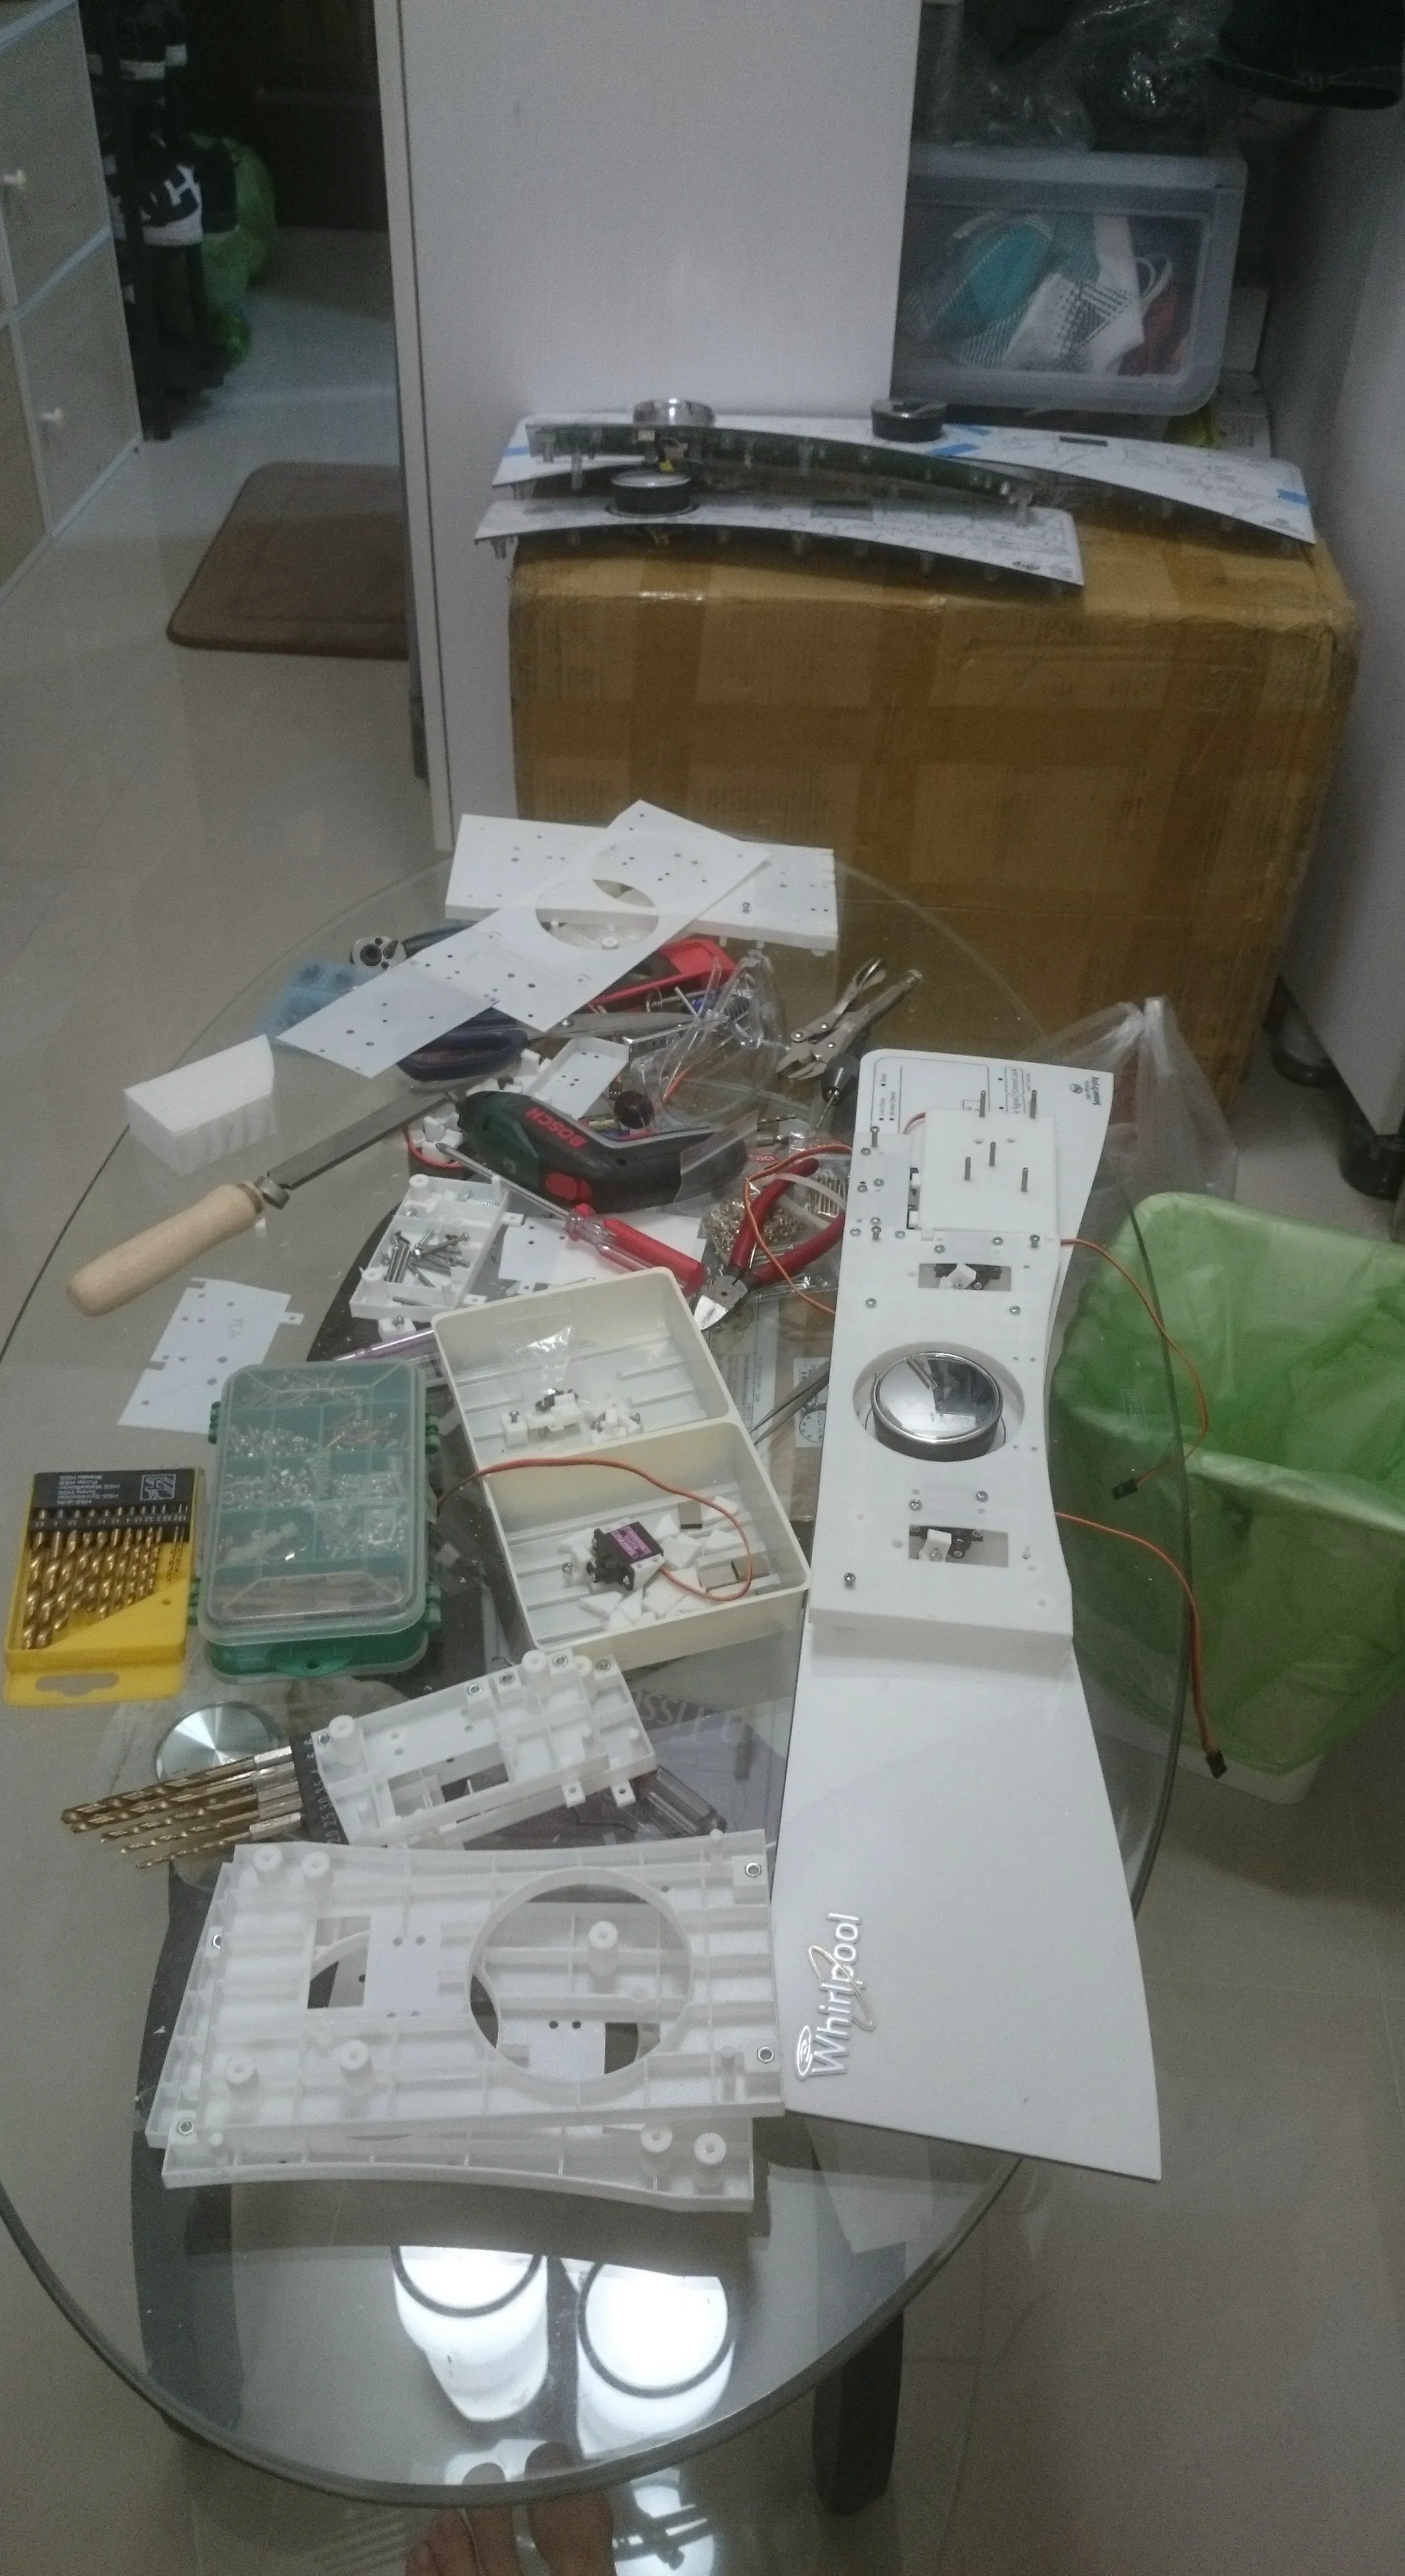 Work Environment
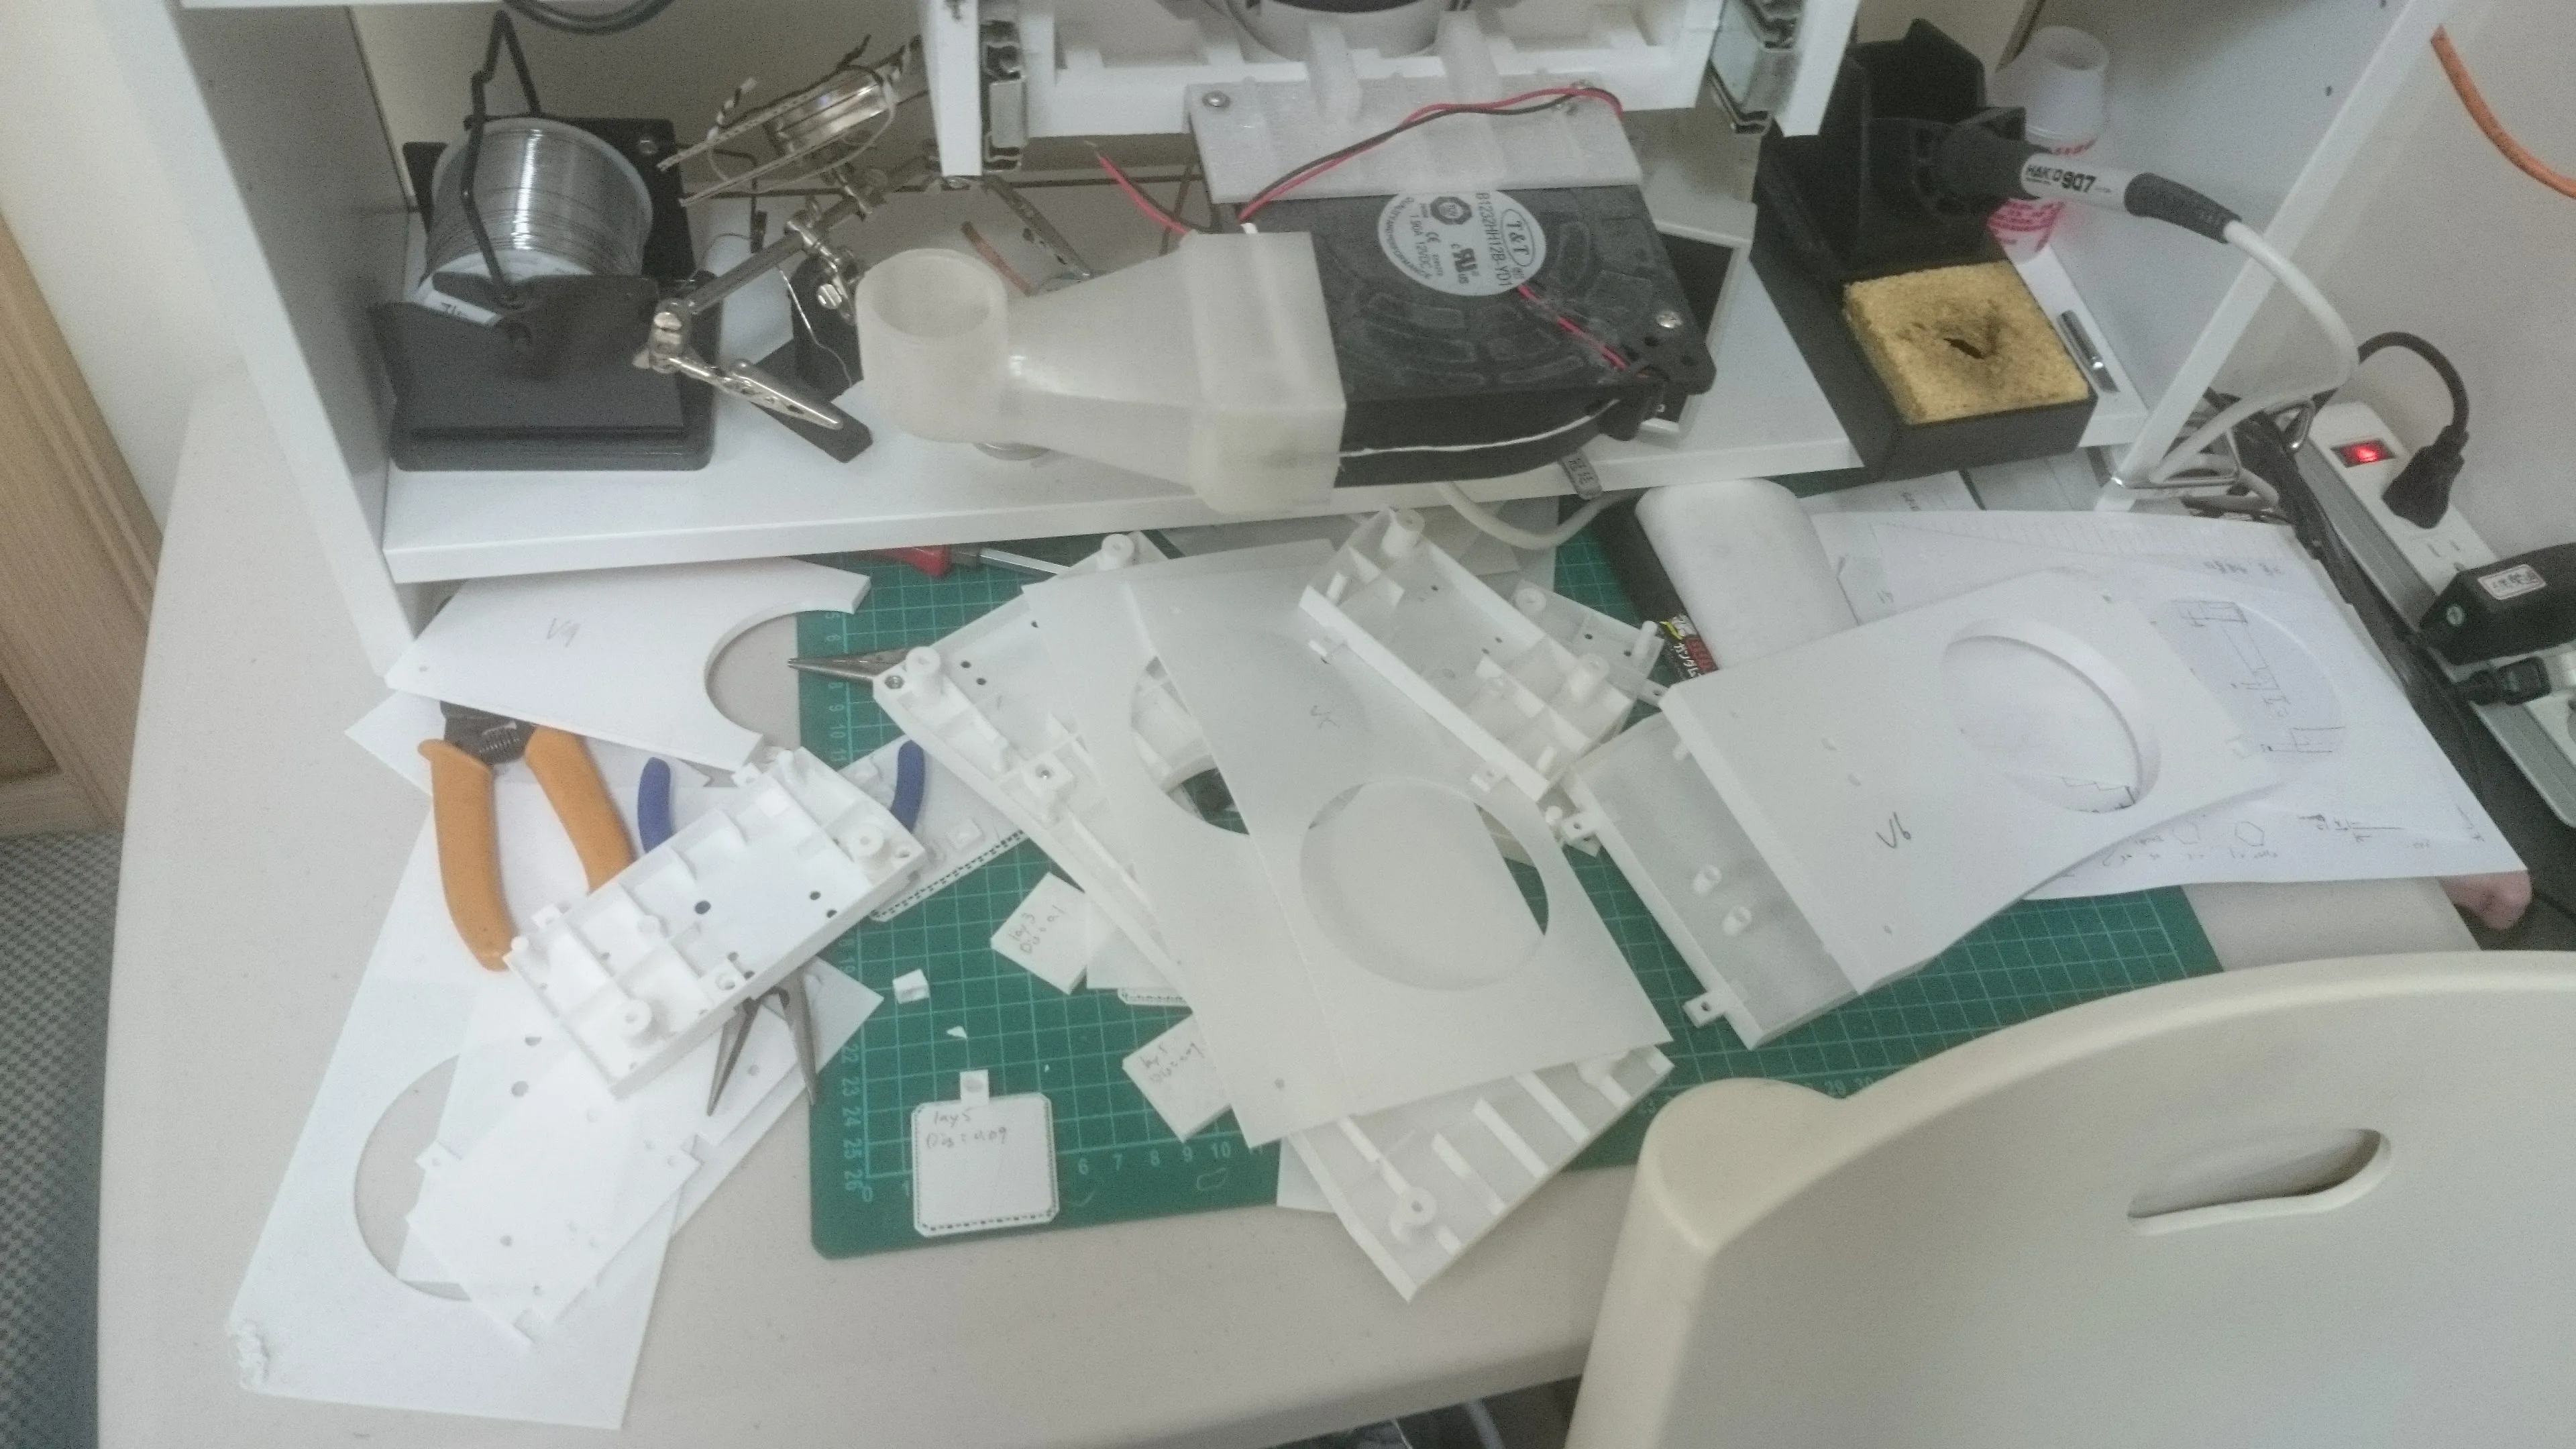 More Testing Development
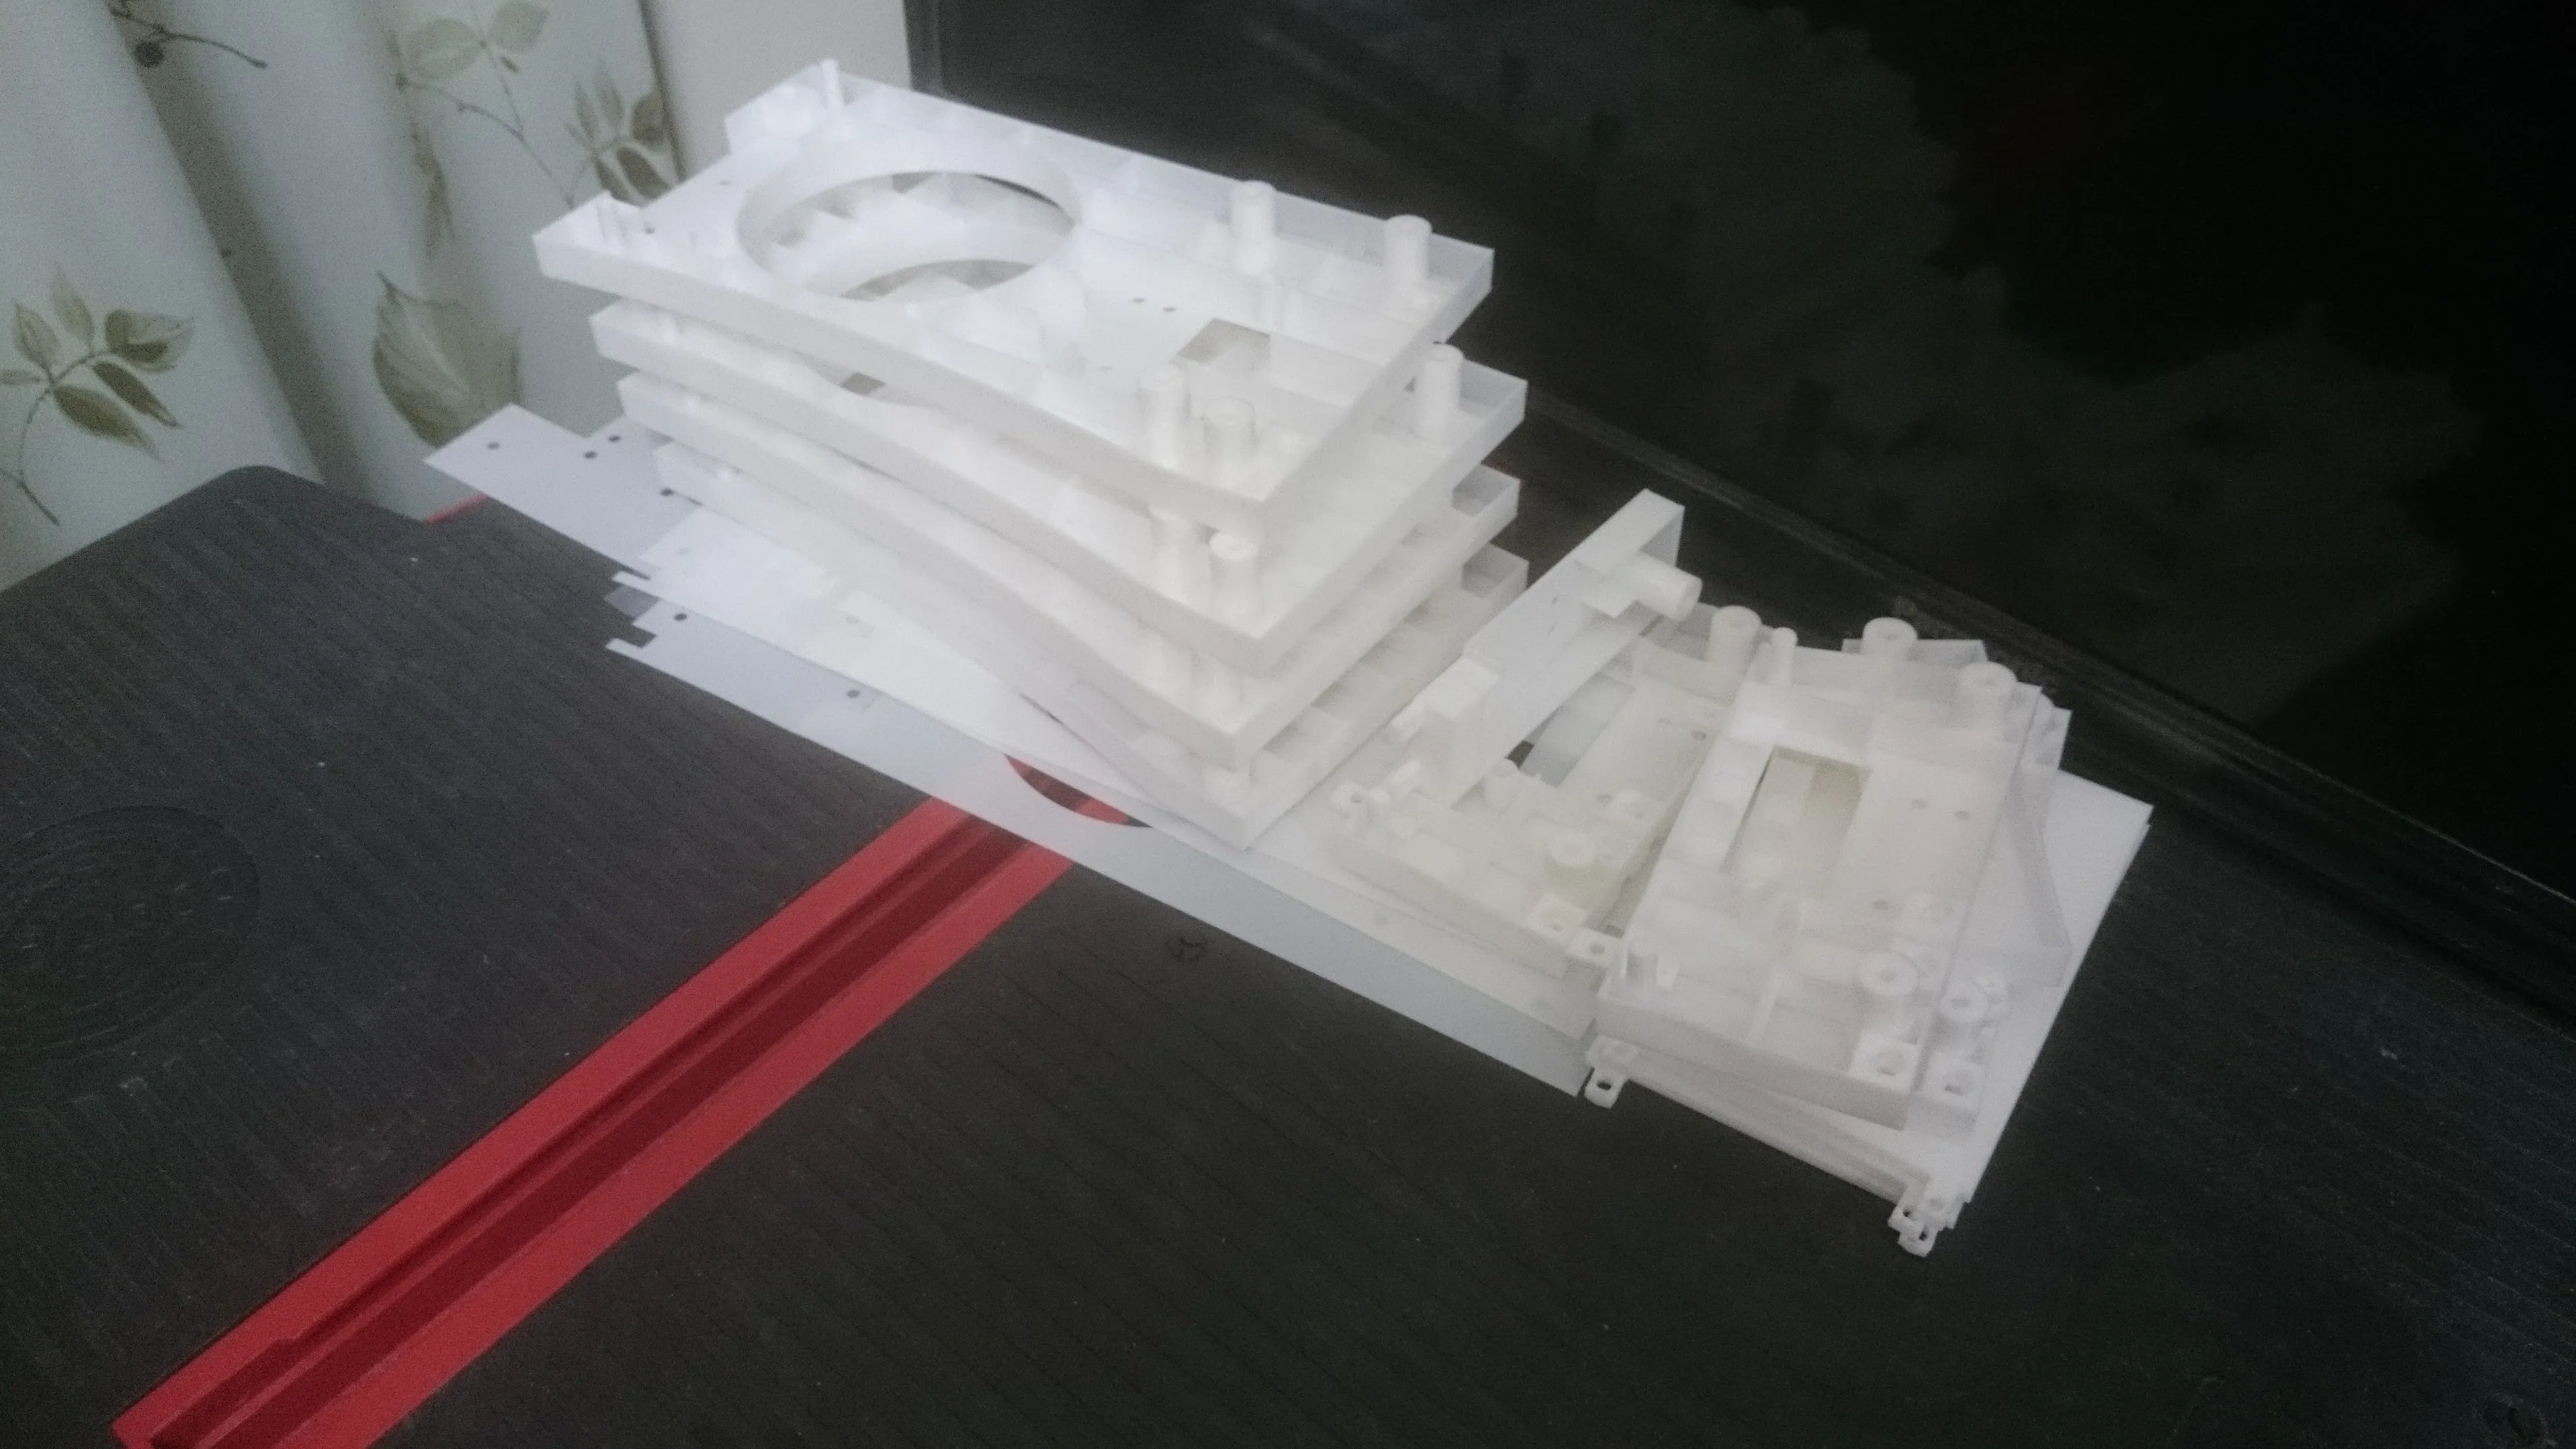 Mass Productions
Reference
- Whirlpool Control Panel Image: https://www.amresupply.com/part/15395157